Cricket Loom Tips
The Cricket Loom is a wonderfully accessible way to create woven fabrics without committing to a room-size loom. It’s an amazingly engineered tool, sturdy, compact, and totally easy; and with it, you can make gorgeous fabrics, like our Woven Scarf.
The Cricket Loom comes with a thorough instruction booklet, but here are an extra few pointers and re-iterations which you may find helpful!
Assembling the Loom
Putting a new Cricket Loom together is a whole lot easier than an afternoon with an Ikea dresser! With the help of a small electric drill, I assembled mine in less than half an hour. (You can also use a screwdriver, it just might take a little longer.)

Reeds
The reed, aka the “heddle,” is the device that holds the threads of the warp in alternate slots and holes. Moving the reed from one position to another is what moves some threads up and others down, creating the “shed”, i.e. the space through which you pass the weft.
Both widths of the Cricket Loom come with an 8-dent reed, which is the perfect size for worsted weight yarns. There are also other reed sizes available to accommodate other size yarns! Here’s a guideline:
- 5-dent: Bulky yarns
- 8-dent: Worsted yarns
- 10-dent: Sport weight yarns
- 12-dent: Fingering weight yarns
Warping the Loom
“Warping the loom” is putting the threads (i.e. the “warp”) onto the loom. (Don’t worry, Cricket’s instructions go over all the basic weaving terms!)
Although the how-to booklet mentions starting to warp the loom two inches from the heddle’s edge, you can warp the loom all the way to the edges of the heddle. Remember that even if your warp reaches the edges, the finished cloth will be a little narrower than the 10 or 15-inch reed because the cloth tends to shrink a bit when you take it off the loom (the Woven Scarf, for example, shrank about 1/2 inch).
When winding on the warp, make sure the paper is wider than the warp and that the warp doesn’t fall off the edges of the paper as you roll.
When you’re tying on the front ends of the warp, start out by tying just half of the surgeon’s knot so that you can adjust the tension more easily. Once the tension feels even, you can finish the knots.

Weaving
Once I got the hang of it, it took me about 4 minutes to weave an inch of this scarf. A lot faster than knitting, and mind you, I was using fingerweight yarns. Imagine how fast anything thicker would be!
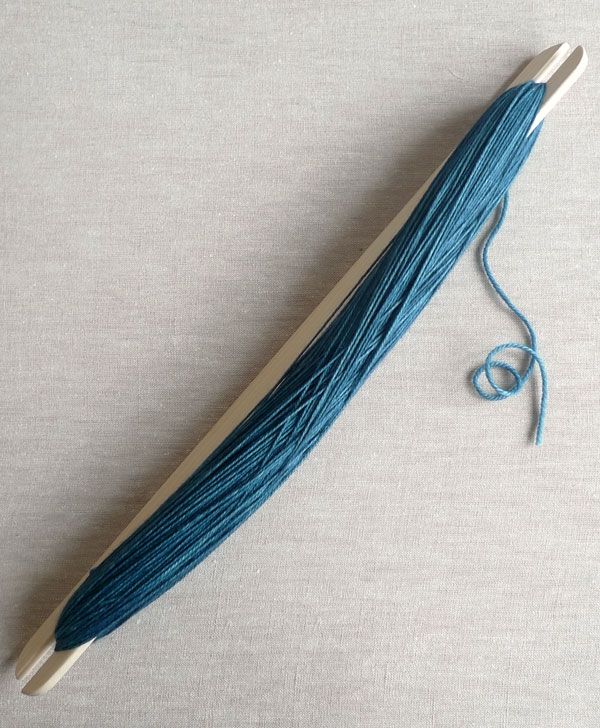
WINDING THE SHUTTLE
You can pack quite a bit of yarn onto the shuttle. As long as it fits through the shed, you’re good, and more yarn means more uninterrupted weaving!
AVOID “DRAW-IN”
Make sure to bring the yarn through the shed at a 45-degree angle. If you bring it straight across, the fabric will “draw-in” and won’t have a nice, relaxed finish.
This is a good place to mention, too, that it’s worth paying special attention to the tension of the weft at the selvedges. Try to keep the yarn relaxed but not sloppy at the selvedges, and most importantly, try to be consistent.

ADDING WEFT
When you come to the end of the yarn that is on the shuttle, just wind a new shuttle and overlap by a few inches the new end with the old end. There will be a short distance where the weaving pattern is interrupted, but it is hardly noticeable!

ADVANCING THE WARP
You should try to keep the warp’s tension as even as possible each time you advance the warp. You don’t have to go crazy with this, but an even warp tension will help keep the weft threads consistent throughout the fabric.
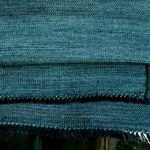
Finishing
Most techniques for finishing hand woven fabric involve a fringe. One of the prettier options is the hemstitch. Click here for a full tutorial on Finishing with Hemstitch. You can also experiment with hemming the ends over, embroidering the ends or making fringe with overhand knots or more elaborate knotting techniques.
Once your finished piece is off the loom, it’s important to hand wash the fabric, squeeze out the excess water, and lay the piece out flat to dry. Depending on the washability of the yarn you used, you may see that the fibers bloom a bit, filling in a loose weave.
Other Ideas
Try using different size yarns for the warp and weft. A heavier warp with a thin weft can have a beautiful effect.
A thin yarn on a large reed with a lightly beat weft will result in a light, gauzy fabric.
And once you’ve got the hang of it, you may want to research different way of setting up the warp for different weave structures. The internet is full of rigid-heddle weaving patterns and inspiration!
Your First Project
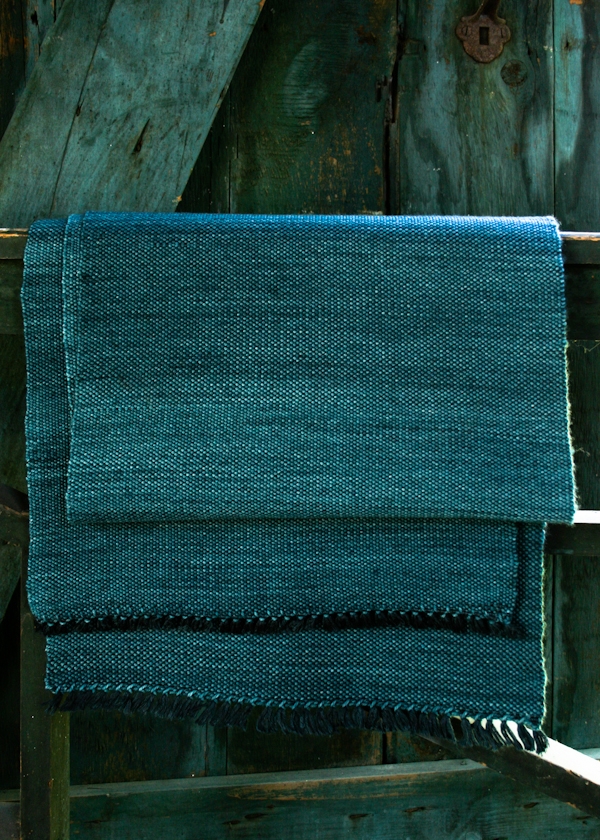
Ready to get started? Try our Woven Scarf! It’s easy, fun and gorgeous! Get the details right here!


I am so freaking excited to see a rigid heddle project!! I just got an Ashford for my birthday and had quite a time muddling through but I seem to have hit my stride. I hope to see lots more weaving projects because you folks make the most beautiful projects and your instructions are impeccable. Weaving certainly helps you get through your yarn stash very quickly!
Could you offer the woven scarf kit with different colors?
Does everything have to end with a fringe? I am put off weaving and buying a loom as it seems so. I haven’t found any means of finishing the fabric without a fringe which just ends up in the way in most instances or all bedraggeled. So how do you make a bag if your fabric has fringe everywhere and you either want finished edges or turned up edges? I can’t find the answer anywhere!
Hi Sara,
I think I just answered your question about this in our Hemstitch Tutorial, but just to say again, you can machine sew a hem on your finished piece of weaving. A serger works great, but so does a simple zigzag stitch along the edge of the finished weaving and a straight stitch to sew down the hem.
I hope this helps you decide to take the Cricket Loom plunge! It’s so much fun!
Whitney
Help,
I’m having trouble warping my Cricket loom… thought
I had it on correctly, but can’t get the return “shed” to
open differently than the lst shed. My yarn just “falls out”
What did I do wrong? Please help! Want to start weaving.
Hello Ann-
We’re having trouble understanding what’s going wrong. When you threaded the reed, did you thread in both the eyes of each bar on the reed (dents) and in between each dent? That way you will be able to control every other warp strand while weaving. If you wouldn’t mind, please feel free to send us over a picture at purlbee@purlsoho.com and we continue to troubleshoot with you.
Best of luck and Happy Weaving!
-Alyson
I just got a Cricket Loom and I love it! I made a large, long woven fabric (I have the 10 inch and warped the loom from edge to edge) and I want to cut the length in half and then sew the two pieces together to make a rug. I can’t find any sewing instructions out there though. I worry that if I make a traditional “seam” it will be too bulky down the middle of the rug. What is the best way to join two pieces of woven fabric? I love the size of the loom but I want to be able to join pieces to make larger items.
Hi Naomi,
Thank you for the comment! A traditional seam would be a little bulky so I’ve used a technique called a Kitchener stitch treating the loops on the selvedge as you would the knit stitches in the tutorial. Here is our tutorial for the project; https://www.purlsoho.com/create/2013/11/11/kitchener-stitch-video/
I hope this helps and feel free to respond if you have anymore questions!
Good Luck!
Jake
The best instructions for he stitching I have come across. Thank you. I use it now on my Ashford RH and my floor loom.
Question. Would you recommend this loom for a mentally challenged person who relies heavily on help? Thank you
Hi, Edna,
Thank you for writing in! I think that if the person relies heavily on help this loom might not be the best for them, unless there is someone who can invest some time with them in the beginning. It can take a bit of patience and focus at first to get the hang of weaving with this loom. However, after a bit it does become quite easy once you find the rhythm of it.
I hope that answers your question. Please let us know if you have further questions.
Best wishes,
Kumeko
Hi!
I got this for my daughter and I for Christmas so we could have a project together. We got started pretty easily, but it seems that when we went to advance and wind when we got too high, it got stuck. Now we can’t move it forward or back. Do you know what happened to make it lock and how to help me fix the problem?
Thanks!
Amanda Marie
Hi Amanda,
Thanks for writing in. So sorry the loom locked on you! The trick is to release both of the locks on the right side of the loom at the same time. The locks are the little levers that connect to the gear-like mechanisms. I hope this helps you out!
Best,
Adam
I am thinking of purchasing the Cricket Loom but wonder if it is possible to have more than 2 sheds. I have some patterns that I have made using my inkle loom that have 3 sheds.
Hi Linda,
Thanks for writing us! It is in my experience that the Cricket Loom can only handle one shed. I haven’t seen multiple sheds on this kind of tabletop loom.
Best,
Adam
Linda Moulton,
If you will use you favorite search engine and enter “rigid heddle looms”, many shops will appear. I am certain you will be able to find answer to your issue. Also, on You Tube, there is a video I saw last night titled something like “How to pick the right Rigid Heddle Loom for you.”
Good Luck,
Debbie
Hi! Question about reeds. Is it absolutely essential to use the weight of yarn that you’ve suggested for each reed size? For instance, could I get away with using fingering weight yarn with an 8-dent reed? What problems might I come across trying this?
I haven’t gotten my Cricket loom yet, so I suppose from all the research I’ve done on the loom, I can’t discern whether using a lighter yarn than suggested would make any difference.
Hi Brianna,
Thanks for the question! An 8-dent reed can be used with fingering weight yarn, but the weave will be much looser, almost like a gauze. The weave will end up fragile, but this could be a good thing! This is because a thinner yarn will not fill in the warp space like a DK or worsted yarn will on such a dent. Hope this answers your question!
-Adam
I recently got a 15 inch Cricket Loom, and would like to make a little carpet with it (or maybe connect several together for a larger rug). Is it possible to use rug wool in my little loom or is that too heavy? Also, if I were to use rug wool, would I warp with cotton? So much to learn!
Thank you.
Danielle
Hi Danielle,
Thanks for the question. You could certainly use rug wool for the weft yarns and cotton for the warp. The cricket loom is not wide enough to make a full rug, so you’ll have to make two or more pieces and whip stitch them together.
All the best,
Adam
I got my Cricket tabletop loom Saturday. I have worked on it for 5 days now and I still have not even started to weave. I can’t get the warp to hold tight. My gears don’t lock right. I turn one gear, lock it and let it go and it slips. I don’t know what I’m doing wrong.
Please help me!
Chana
Hi Chana,
Thanks for writing in! Curious issue indeed! I would ensure that both of the gears as installed in the correct orientation per the instruction booklet that comes with the loom. I would also be sure to check that the gear on the other side is also engaged as both must be engaged in order to tighten the warp. If you continue to have difficulties, Schacht has fantastic customer service and full support page with lots of documents for their lovely products. It can be found here: http://schachtspindle.com/product-support/
I hope that this helps and please let us know if we can be of any further assistance!
Cassy
I love the look of this scarf but so scared to try it. Please put up a YouTube tutorials! I am so new to the terms and everything in inches don’t help 🙁
Hi June,
Thanks for writing in! Thank you for your request; we will certainly keep it in mind! I would say that you should jump in with a test project! When I first got my loom, I used the booklet included and the test yarn that it came with to practice warping the loom and weaving a little test piece. This got me comfortable with the terminology and the actual act of weaving.
I hope that this helps!
Cassy
I am interested in purchasing the Cricket, but im a first time weaver. What sized loom would you recommend for a beginner like myself?
Hi Nati,
Thanks for writing in! I think that either the 10″ or the 15″ would work well. The nice thing about the 15″ Cricket is that you can make everything that you can on the 10″ plus items that are 5″ wider. The 15″ certainly will give you a bit more flexibility!
Best,
Cassy
I am considering purchasing this loom and I am wondering if there are any additional accessories I might need?
Hello Michele,
Thank you for reaching out! This loom comes with everything you need to get started. This loom comes with an 8 dent Cricket Reed which determines your weaving gauge. Depending on which project you have in mind you might need to purchase different sized Cricket Reeds.
I hope this helps and happy weaving!
-Marilla
When wrapping do you tie off the back warp first ? I haven’t done any weaving in awhile and I am getting frustrated . Would like to get this done before Christmas of this year.Thanks for taking questions.
Hi Kathy,
Thanks for reaching out! When warping the Cricket Loom, you will be tying off on the back beam first. We find that the instruction booklet that comes with the Cricket Loom (http://www.schachtspindle.com/pdfs/Cricket-Loom-0614.pdf) is very helpful for learning to warp it. It can take a bit of getting used to but the directions are quite clear and helpful are are just what I used to learn to warp my own Cricket loom!
I hope that this helps!
Cassy