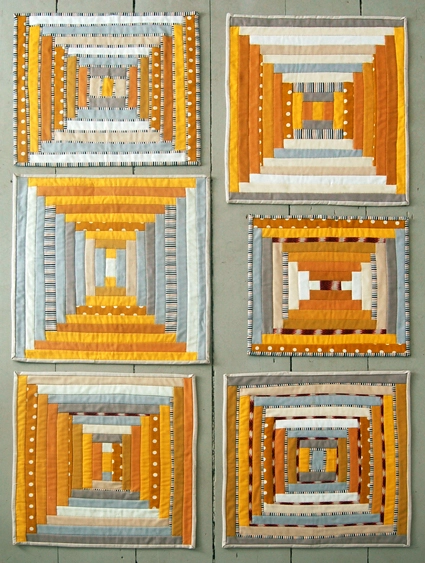
Mini Quilt of the Month, January: Courthouse Steps
Quilts often seem a little intimidating, to me at least, because of their size and scale. I’ll get inspired to try something but often get discouraged when I think about all the steps involved, from cutting a million little pieces to basting the finished top, to hand finishing the binding. So I was really excited when Joelle and Page approached me about doing a new monthly series on The Purl Bee featuring mini quilts. I love the idea of trying out different quilt ideas on a smaller scale where you can actually finish a bunch of them. It’s also a great idea for decorating since they look so cute all hanging together on a wall!

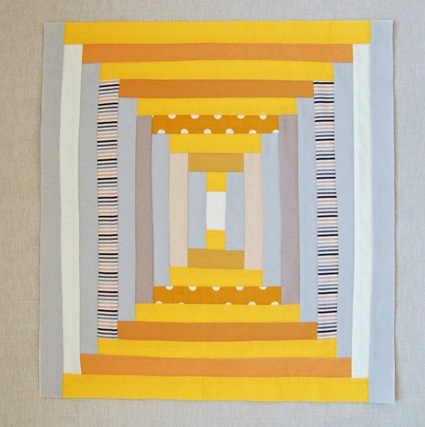
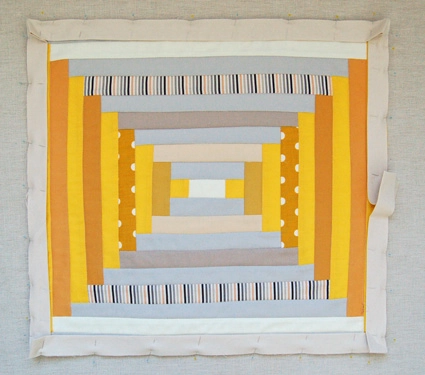
We are always inspired by vintage quilts, their colors, patterns and textures are so incredible and really deserve to be put on the same artistic level as painting. So, for our very first Mini Quilt of the Month we decided to explore a traditional quilt block called “Courthouse Steps” which takes its name from the stepped pattern it makes. This block is a variation of a log cabin block, which you may be more familiar with, but it’s pieced in a slightly different manner. We are really looking forward to bringing you a new mini quilt project every month this year. Each one will be thoroughly explained from cutting to finishing so we think they will be a great place to start if you’ve considered making a quilt but are intimidated by the process. Enjoy! — Molly
Materials
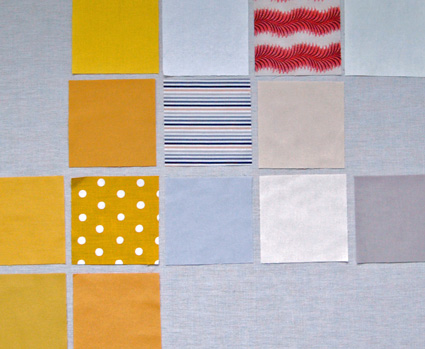
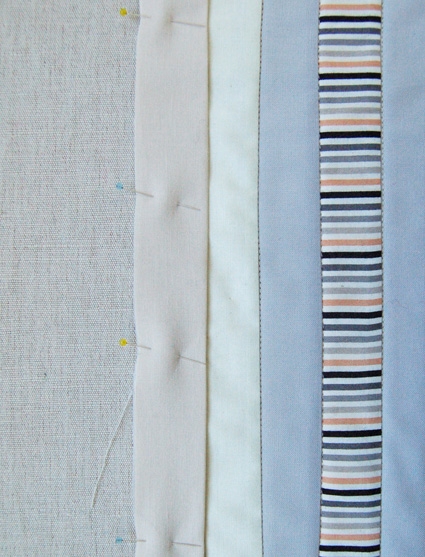
1 1/2 yard of an assortment of cotton fabrics for the Tops. I used . . .
- Purl Soho Spectrum Bundle, Sunflower. This particular bundle is no longer available, but please check out all of our current Spectrum Bundles for some great alternatives.
- Purl Soho Spectrum Bundle, Cloud. This particular bundle is no longer available, but please check out all of our current Spectrum Bundles for some great alternatives.
- 3/4 yard of fabric in a variety of prints.
2 yards of cotton fabric for the Backing and Binding. I used . . .
- 2 yards of Robert Kaufman’s Kona Cotton, Natural
You will also need . . .
- 100% cotton thread in a coordinating color, 274 yards
- Twin size Quilters Dream Natural Request Dream cotton batting
- Collins’ Binding Clips
- A handsewing needle
These are enough materials to make up to six 18 by 20-inch mini quilts.
Size
Each mini quilt measures approximately 18 by 20 inches.
Note
All of the seam allowances in this project are a precise 1/4-inch. Use your machine’s 1/4-inch presser foot if you have one.
Pattern
Cut the Top Pieces
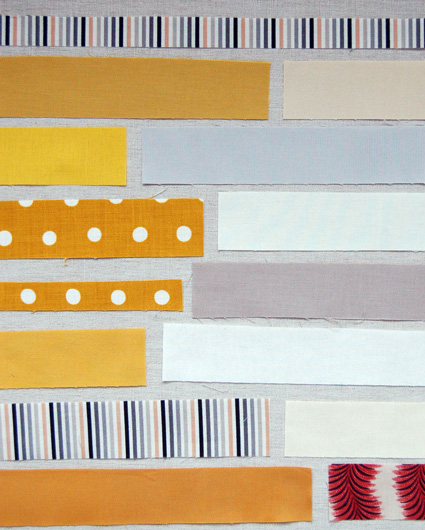
Precisely cut all of the Top fabrics into long 1 1/2-inch wide strips. Cut some of the brighter more contrasting strips in half again to make a few 3/4-inch strips. Note: When cutting simple rectangular shapes for patterns such as this, straight, clean cuts are key. The best way to make these cuts is with a rotary cutter and a non-slip quilting ruler on a self-healing cutting mat. If you have limited experience using a rotary cutter, I recommend visiting our Rotary Cutting Tutorial. Organize the strips so that you have two color groups, in the instructions below I called the grays Group A and the yellows Group B.
Piece the Top
All of the quilts are pieced in the same fashion. If you get the basics of this block down there are endless variations (keep reading below for the six variations I tried.)
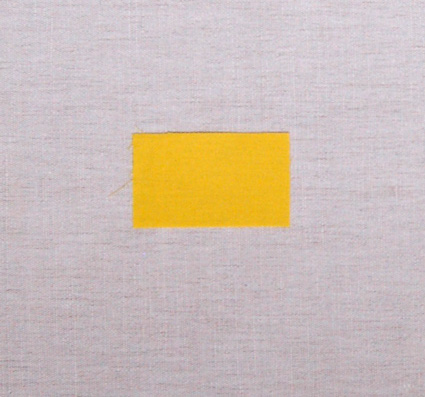
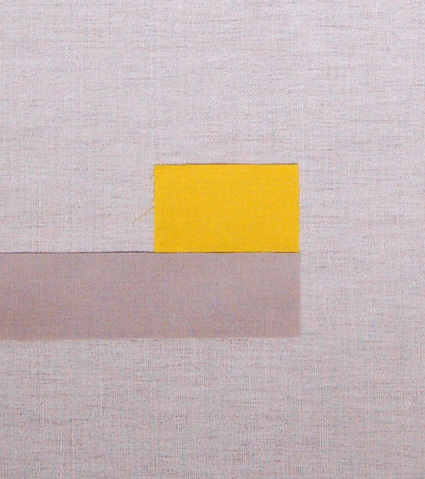
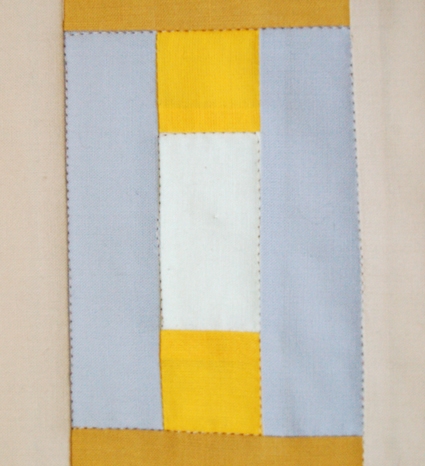
Pick a strip that you would like to be your center piece (I picked mine from Group B). Cut it to 2 1/2-inches long.
Line up a strip from Group A along one side of the center piece (you can start on either the long side of the center piece as I did in the picture above, or the short side, the stepping effect will still be the same in the end. See the individual quilt variations at the bottom of this post to see examples of starting on the short side of the center piece.) Cut the Group A strip to be the same length as the center piece and pin it to the center piece.
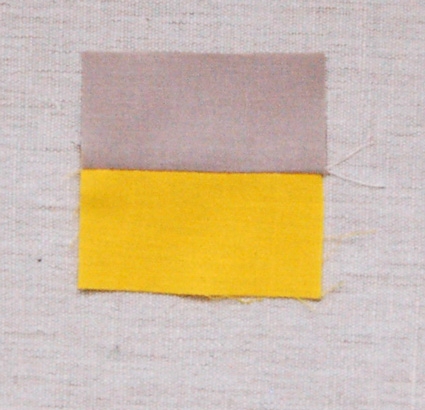
Sew the pieces together along the pinned side and press the seam allowance to the dark side.

Next, cut and piece the Group A strip on the opposite side of the center piece in the same manner.
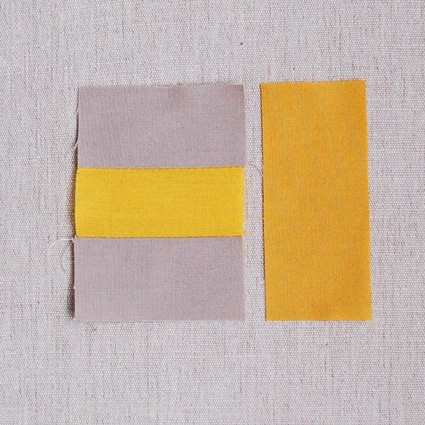
Cut a strip from Group B to be the same length as one of the long sides of your three sewn pieces as shown above. Sew this Group B strip to these pieces and press the seam towards the Group B piece.
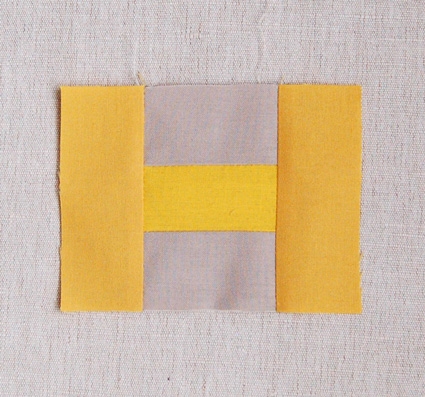
Cut and sew the Group B strip to the opposite side in the same manner.
Keep repeating this process to grow your top larger, alternating between cutting and piecing the Group A strips to the top and bottom of the piece, and then cutting and piecing the Group B strips to the left and right.
You don’t always have to use the same strip on each level. Above, I used different strips from Group A for the top and bottom.
Piece your thinner strips in exactly the same manner, with a precise 1/4-inch seam allowance. For more piecing ideas please check out the Variations section at the end of this post.
Baste
Once your top has reached it’s desired size you can press it and trim it so that the edges are all straight. Cut and press a piece of the backing fabric to be a couple inches larger (on all four sides) than the quilt top. Lay the backing fabric, right side down, smoothly on a flat surface. Cut a piece of batting just a little smaller than the backing fabric and smooth it neatly over the backing. Finally place the top, right side up, onto the backing and batting layer centering it so that the batting and the backing show around all four of its sides. This is your quilt sandwich.
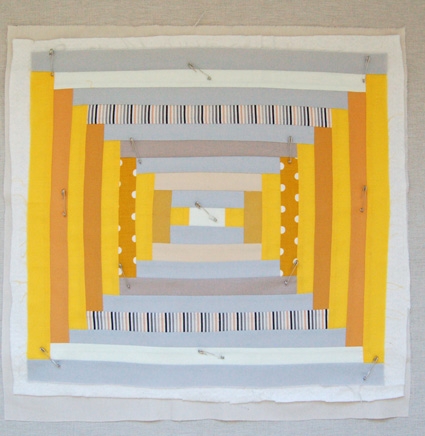
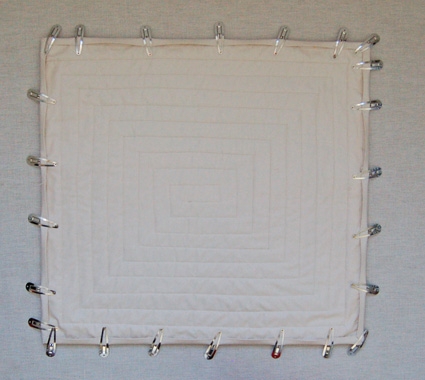
The quilts I made were very small, so technically they didn’t really need to be basted. However, something this size is a good way to practice proper technique so I went ahead and basted them by safety pinning through all the three layers (top, batting, and backing) every 5 inches across the entire piece.
Quilt
You can quilt in any pattern you like as long as there are quilting stitches no less than 8-inches apart. You could simply quilt straight lines across the whole piece or choose to quilt over a few isolated pieces. For my mini quilts I “stitched in the ditch” of the seams in a spiral as illustrated in the picture above. Stitching in the ditch means to sew right beside the seam on the lower piece (the higher piece has the seam allowance behind it).

To quilt by machine, use your machine’s walking foot. To stitch in a spiral pattern, lift the presser foot, but keep your needle down and pivot the quilt every time you change direction.
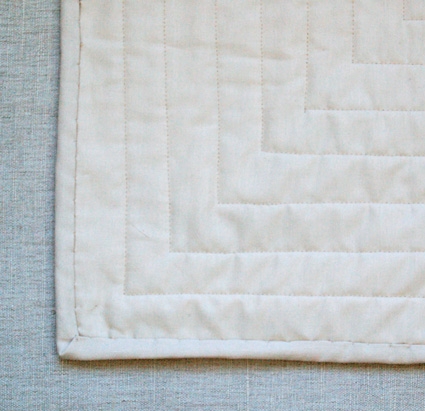
Here is a detail of stitching in the ditch.
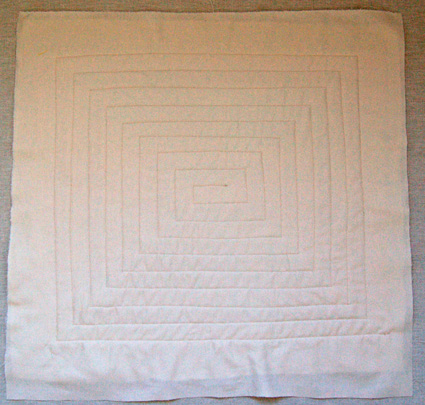
Quilt around your entire piece. The back should look neat and clean.
Once you’re done quilting trim the batting and backing to match up with the top.
Prepare the Binding
Cut the binding fabric into 2 1/4-inch strips from selvage to selvage . Measure the length around all four sides of the quilt and piece together enough binding strips to make one strip that is at least 12-inches longer than this length. To piece together binding strips pin their ends together at a 90-degree angle as shown above. Using a pencil or Hera Marker make a mark diagonally across the middle of the square where they overlap as shown above. Sew across this marking.
Clip the corner to create a 1/4-inch seam allowance as shown above.

Press the strips flat with the seam to one side.
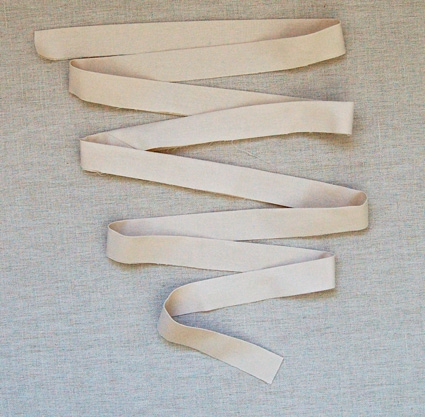
Fold the binding strip in half across its entire length, so the long raw edges meet up.
Bind the Quilt
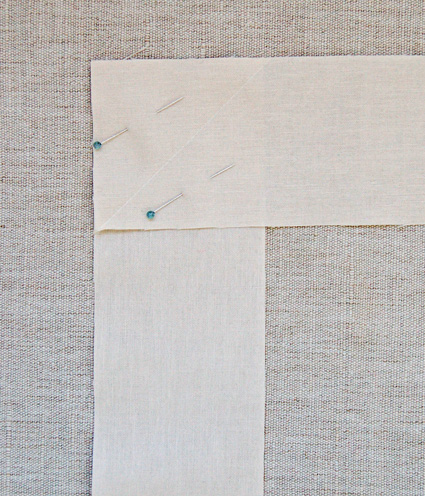
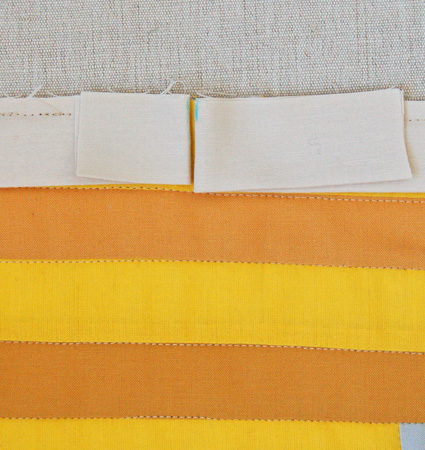
With the quilt facing right side up, pin the binding strip to the top so that the raw edges of the strip meet up with the raw edges of the quilt. The folded edge of the binding strip will be facing towards the inside of the quilt.

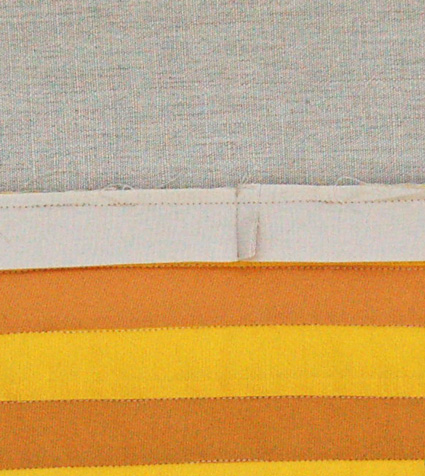
When you get to a corner fold the binding strip on top of itself to make a triangle at the turn as shown above. This little triangle will be essential for making mitered corners in the next steps.
Pin the binding around all 4 sides of the quilt in this manner, leaving a tail at the beginning and end of the strip un-pinned as shown in the middle of the right side in the picture above. Sew the binding to the quilt with a 1/4-inch seam allowance, stopping your seams 1/4-inch before each corner and then starting the next seam 1/4-inch after the corner. Leave a 3-inch gap where the tails are.
To sew down the tails lay them flat and mark where they meet in the middle of your gap.
Sew them together at this marking (making sure the seam is on the top side of the binding) and trim the seam allowance to 1/4-inch. Then sew across the gap with a 1/4-inch seam allowance as shown above.
With the binding sewn all the way around, flip the quilt so that the back side is facing up. Flip the binding around to the back and, using the binding clips, clip the binding down so that it covers the binding seam.

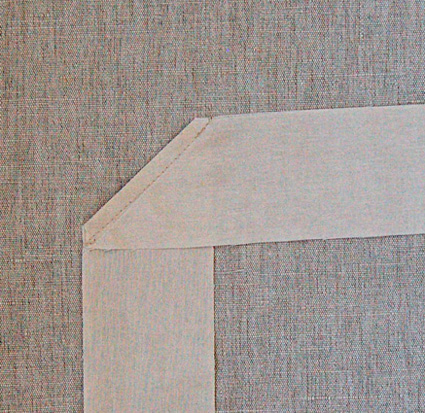
When you come to the corners miter them as shown above. They should easily fold into place.
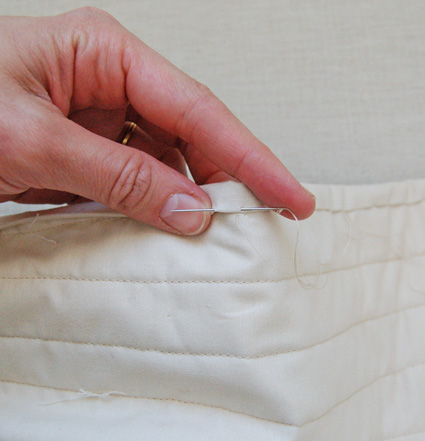
Tack the binding onto the back of the quilt using a slip stitch: pull your needle though the fold of the binding as shown above.
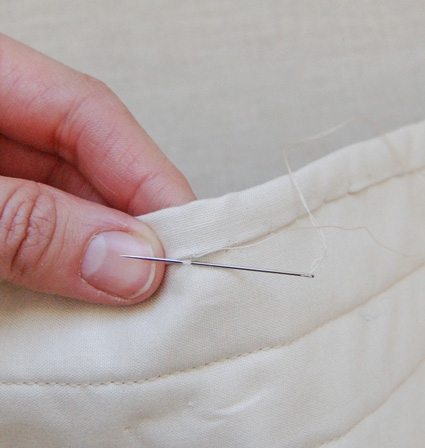
Then take a tiny stitch from the back of the quilt as shown above and travel through the binding fold again.
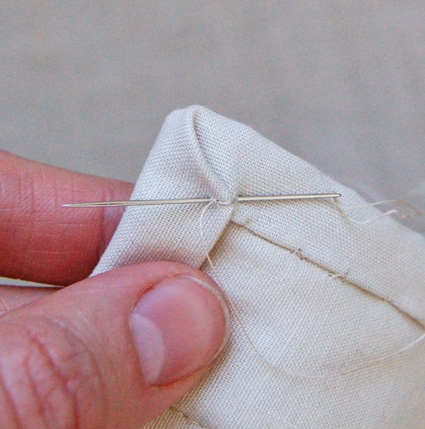
Take a few tacking stitches at each corner to sew it into place.
Block Variations
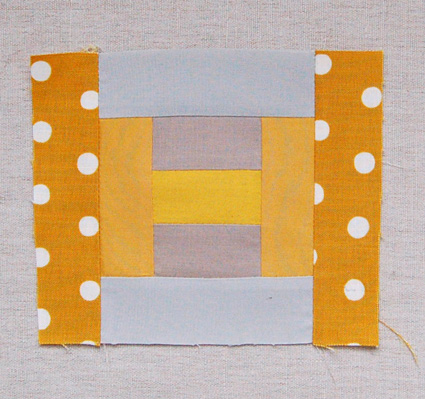
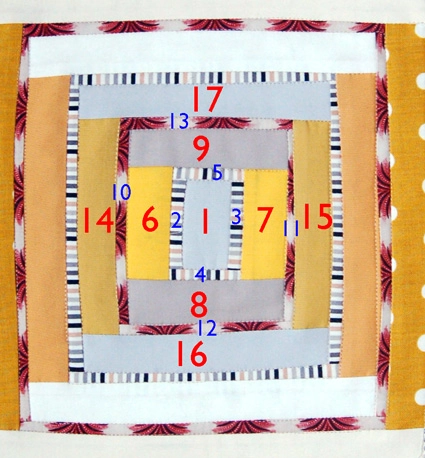
Version 1
This variation uses a random assortment, with the same strip used on either side of each pieced level. See below for the piecing order.
This variation is sewn exactly like the example in the following order:
- Cut and sew a strip from Group B to Piece #1 along its long side (this is piece #2)
- Cut and sew the same strip from Group B to the opposite side of piece #1 (this is piece #3)
- Cut and sew a strip from Group A to the long side of pieces # 1, 2 and 3 (this is piece #4)
- Cut and sew the same strip from Group B to the opposite side (this is piece #5)
- Continue in this manner until the quilt top is the desired size.
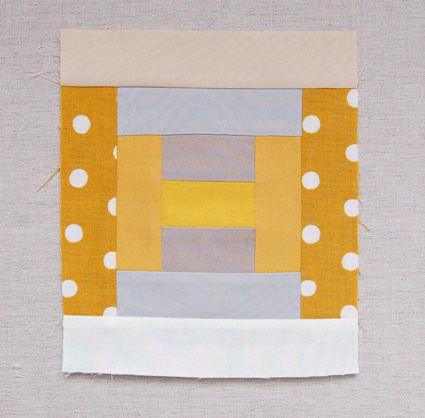
Version 2
This variation uses a random assortment of the Groups A and B but the opposite sides of each layer are different fabrics.
This variation is pieced like the example with the exception of the first three pieces: the 2nd and 3rd pieces are sewn to the short sides of the first piece instead of the long sides.
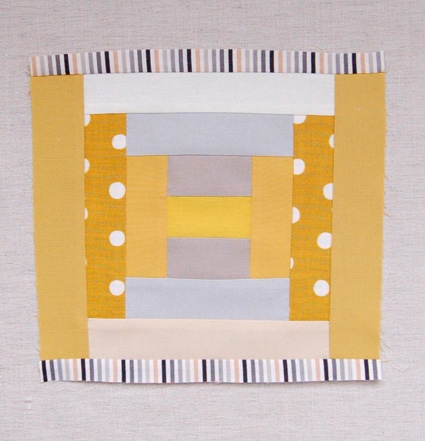
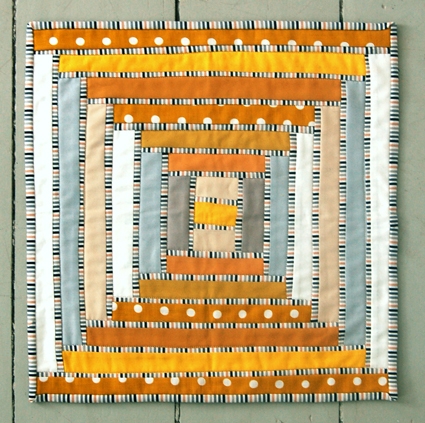
Version 3
This quilt is made with a random assortment of thick and thin strips and bound with a stripe to set it off.
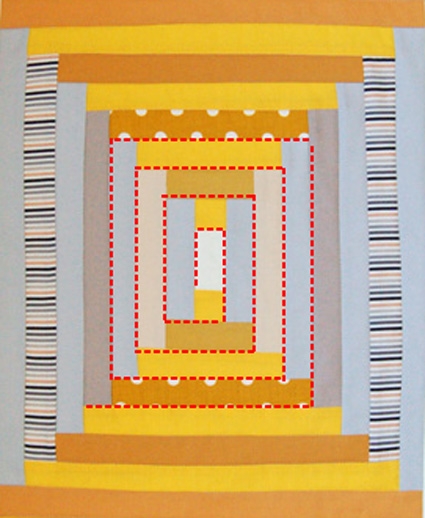
It is pieced in a very simple way according to the diagram above.
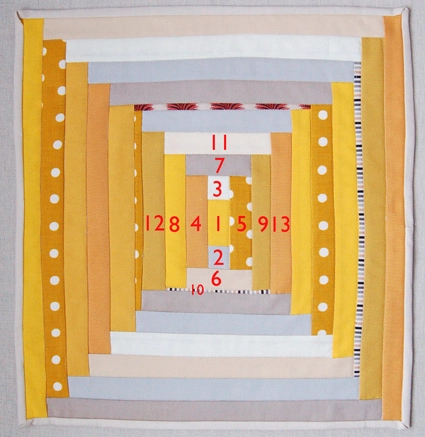
Version 4
This piece is made with a random assortment of the wider strips and alternating with two different prints of the thinner strips.
Although this top looks different than the rest it is pieced in the same manner, just alternating a thick layer with a thin layer.
- Pick two different thin strips: Thin Strip A and Thin Strip B
- Sew Thin Strip A to both long sides of piece #1 (these are pieces #2 and 3)
- Sew Thin Strip A along both pieced edges of your first sewn strips (these are pieces #4 and 5)
- Sew a thicker strip from Group B to the long edges of your first 5 pieces (these are pieces #6 and 7)
- Sew a thicker strip from Group A to the long edges of the quilt top (these are pieces #8 and 9)
- Sew Thin Strip B along both long sides of the top (these are pieces #10 and 11)
- Sew Thin Strip B along both short sides of the top (these are pieces #12 and 13)
- Repeat in this manner, alternating the thin strips, until the quilt is the desired size.
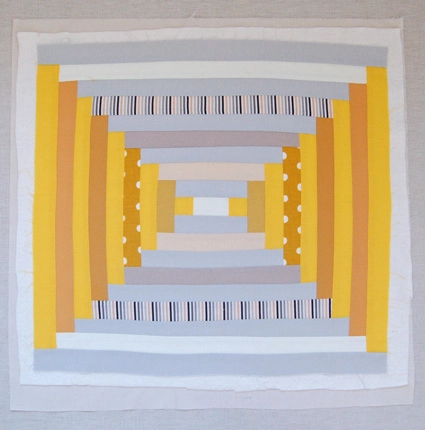
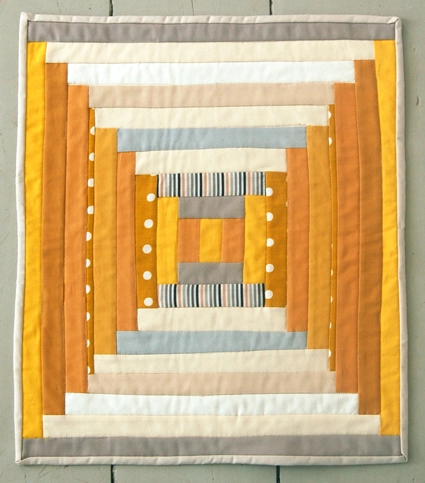
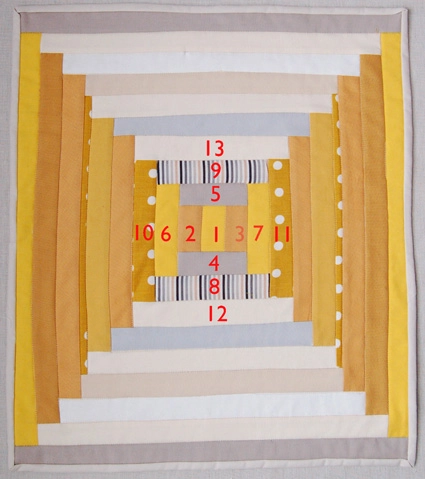
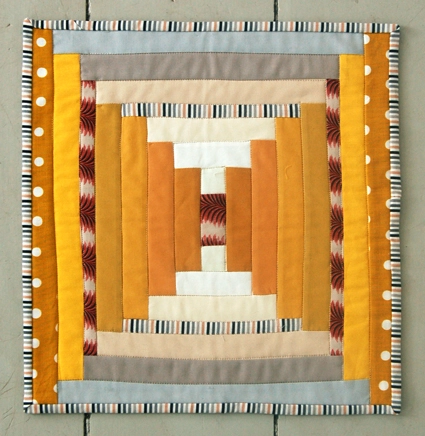
Version 5
This is one of the most striking of the quilts in the bunch and it’s slightly more complicated to piece.
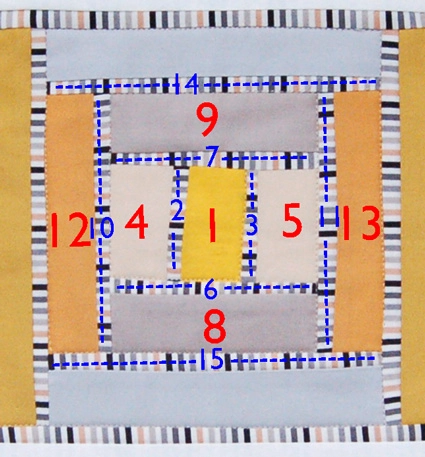
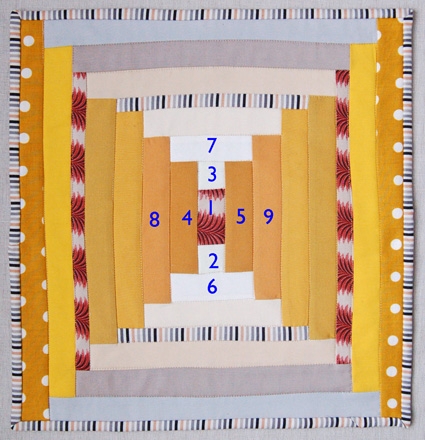
This quilt is pieced in a slightly different manner but with the same basic idea. You are essentially sewing a border of the thinner strips around each side of the step pattern: Pick a thin strip to be your border pieces (I chose a small stripe)
- Cut and sew a thin strip on each long side of piece #1 (these are pieces #2 and 3)
- Cut and sew a thicker strip along the long sides of pieces # 2 and 3 (these are pieces #4 and 5)
- Cut and sew a thin strip along each of the long sides of the top (these are pieces #6 and 7)
- Cut and sew a thicker strip along the long sides of pieces # 6 and 7 (these are pieces #8 and 9)
- Repeat until your quilt is the desired size.
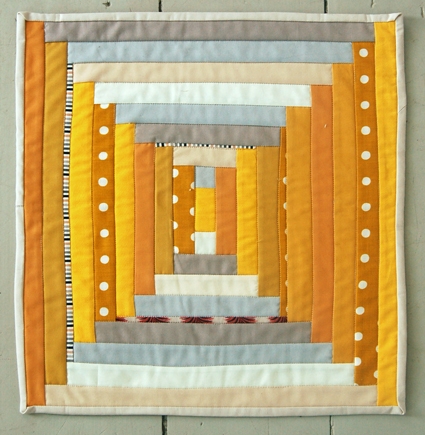
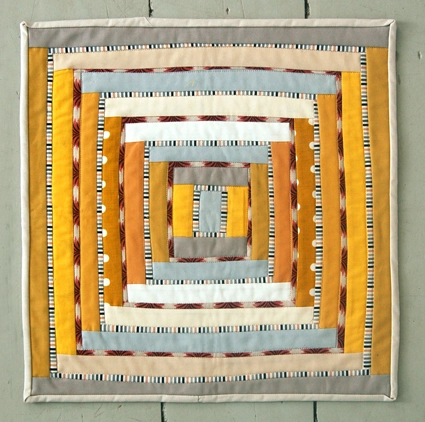
Version 6
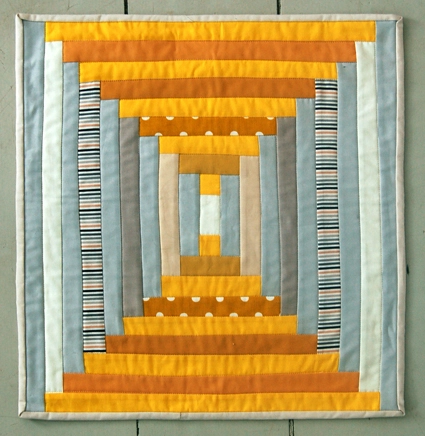
This quilt is made by alternating a random strip from the groups with a specific gray and a specific yellow.

It is pieced in the order above.

As you can see there are endless variations of this block! I hope you enjoy exploring them as much as I did!


So beautiful, Molly. Super-inspiring.
I LOVE these!!!
You know, the Alzheimer's Art Quilt Initiative asks for mini quilts to be donated, for them to sell/auction as fundraisers. They take minis no larger than 9″ x 12″, that can fit inside a Priority Mail envelope. Seeing a few designs that would fit their criteria would be great!
Very cute and inspiring. Love the striped fabric, that really adds to the design.
How did you mount them to the wall?
I would love to make these all through the year then stitch them together to make a large quilt! Would you suggest I back each one as I go along or back as a whole piece at the end of the year?
Hi Tasha-
That sounds like a great idea. We can't wait to see it! I think it would be best to wait until the end to quilt and back them.
Thanks!– Molly
This looks like a fun project. As a quilter I can totally relate to the amount of effort required to make a small quilt versus the time required to make a full-sized one. I noticed that in printing out your instructions, there are NO pictures. Just little blue squares where the pictures should be. I don't usually have this problem when printing your instructions. Is this something new?
Hi Karen-
Thanks so much for your nice comment. This is the first we've heard of this kind of printing problem. Perhaps you could try printing it from a different browser, ie- Firefox or Chrome if you are using Internet Explorer or Safari?
Please let me know if this problem persists.
Thank you!- Molly
I had no pictures either….
Wow, great instructions. Having never done “proper” patchwork before I have almost finished my first piece! So clear and easy to follow. It is on my blog..
http://chickenlickenscreations.blogspot.com/ Thank you I can't wait til next month now!
I would love to see a picture of the back of the finished pieces to see what was used to hang them. Thanks!
Please send this to me so I can print it. Thanks
Hi Sharon-
You can print this easily from this page. If you’re on a desktop version of the site, you will find a “print” icon in the right column just below the date and tags. If you’re on a mobile version of the site, you will find a “print” icon below the pattern and above the comments.
Follow the easy on-screen instructions to delete whichever parts of the pattern you don’t want to print or save. For example, you may decide to shorten the pattern by omitting certain images or the list of materials.
Thank you for getting in touch!
– Molly
This pattern looks like there all kinds of possibilities!
In the “Prepare the Binding” section it says “Cut the binding fabric into 2 1/4-inch strips from selvage to selvage”. Is this correct? I imagine that the strips would have to be wider than 1/4inch, no?
It is my first time binding a quilt, so I may be off, but I am just not sure!
Hi Lana,
Thanks for writing in! The strips that you will be cutting should be 2 1/4″ wide (2.25″). This does result in a rather thin final binding that we think looks great with this small quilt!
I hope that this helps!
Cassy
I started a. Quilt using the courthouse pattern along with star blocks. Now I cannot find the pattern to finish the quilt, could you help me ?
Hi Elmira,
Thanks for the question. Is the pattern you are using our pattern? I’m afraid I can’t help you if I don’t know what the pattern is. Let me know…
-Adam
So complete. Thanks for all the work you put not this tutorial.
I see that this is a block for the month of January … We are nearing the end of June and I am wondering about blocks for months after January. I would love to get involved in creating one special block each month (in addition to my normal every-day bigger quilts) as this looks like lots of fun.
Hi Annie,
Thanks for reaching out! Our series of monthly mini quilts is actually from back in 2011 and the full year of 12 quilts can be found by clicking here!
Best,
Julianna
I ran across variation 5 on Pinterest today 8/23/19 and it is amazing!
I too stumbled across this while looking up log cabin patterns. I was hoping to try this out but cannot see any of the linked images on the page. Are these no longer available? Thank you 🙂
Hi Ujwala,
Thanks for reaching out! We have been experiencing some issues due to a recent update of our website and there are some residual kinks we are trying to get worked out! Thank you for bringing this to our attention, we are working hard to get the missing images back as soon as possible and we appreciate your patience in the meantime!
All the best,
Gianna
Hi! It looks like these bundles are no longer in stock. What do you recommend for fabric? Thanks!
Hi Courtney,
Thanks for reaching out. I would recommend using Spectrum Cotton for this quilt! But since that fabric only comes in solids, I would recommend Tana Lawn Seasonals + Classics if you want to use some patterned fabric. Hope this helps!
All the best,
Lili