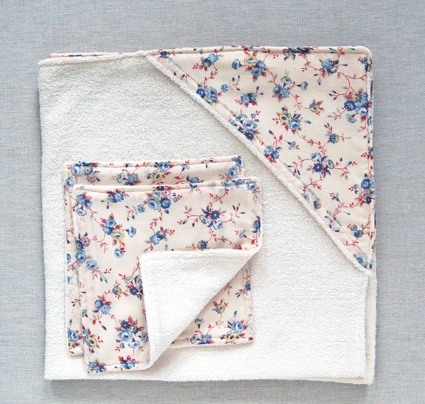
Hooded Baby Towel and Washcloth Set

This project is relatively quick and very simple to sew. I think it would make a perfect gift for your next baby shower!
Designed by Purl Soho designer, Molly Schnick. Click here to see even more of Molly’s work!
Materials
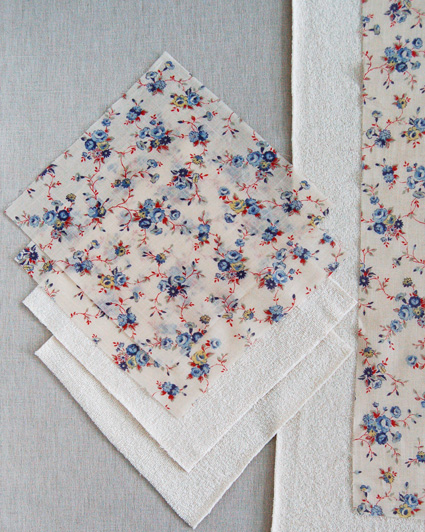
To make one 31-inch square towel and two 9-inch washcloths:
- 1 1/4 yard of Michael Miller Organic Terry Cloth
- 1 1/4 yard Kokka Fabrics Sheer Floral in Blue Posies
- 100% cotton thread in color #1105
Please keep in mind that the Terry Cloth used here is a knit fabric so it has a lot more stretch that the sheer floral. Be very careful when cutting and sewing it not to stretch it out. Do not pull while you’re sewing. As long as you’re gentle with the Terry Cloth everything should work out fine!
Cutting
For the towel, cut:
- One 32-inch square from the Terry Cloth
- One 32-inch square from the Sheer Floral
- One 12-inch square from the Terry Cloth
- One 12-inch square from the Sheer Floral
For the washcloths, cut:
- Two 10-inch squares from the Terry Cloth
- Two 10-inch squares from the Sheer Floral
Sewing the Washcloths
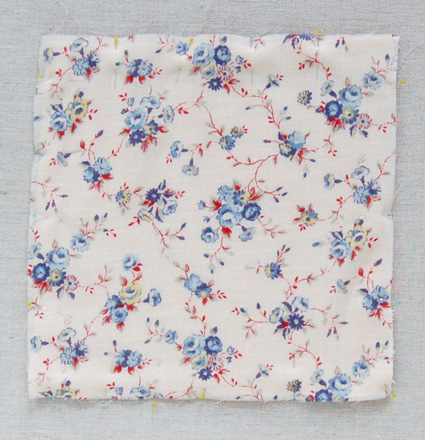
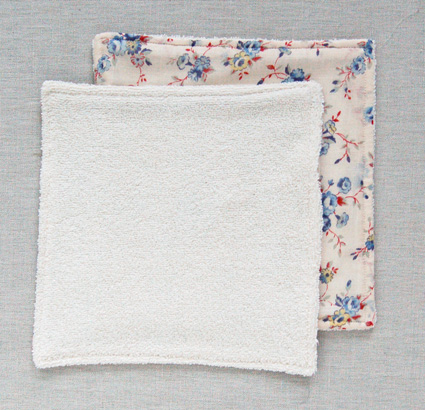
Pin one of the 10-inch Sheer Floral squares to one of the 10-inch Terry Cloth squares with their right sides together. It can be hard to tell which is the right side of the Sheer Floral so be careful! The right side of the Terry Cloth is the fuzzy side.
Sew the squares together with a 1/2-inch seam allowance, leaving a 2-inch gap on one side unsewn as shown above. Backstitch at the beginning and end of this seam.
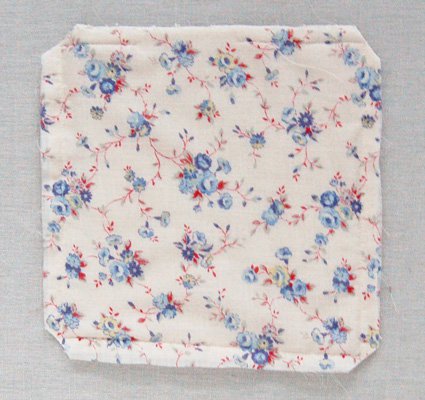
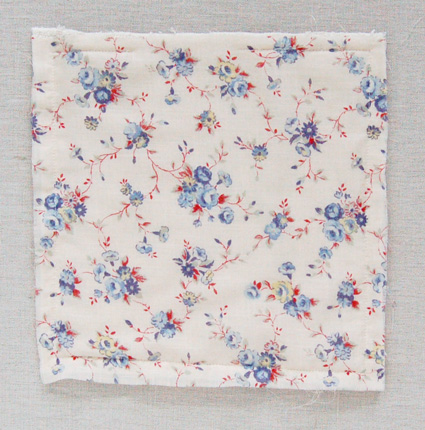
Snip off all four corners of the square and turn the piece right sides out through the 2-inch gap.
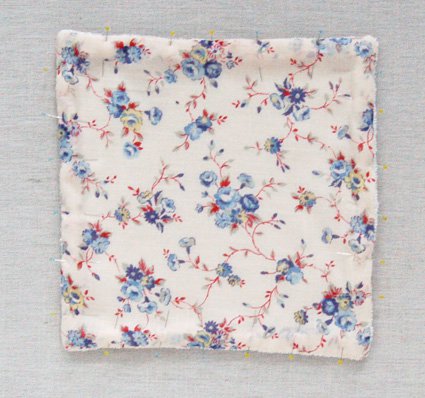
Iron the piece flat making sure the corners are nice and pointy and pin along the edges. Iron and pin the 2-inch gap closed with it’s raw 1/2-inch seam allowances tucked inside the piece.

Stitch around the entire piece with a 1/4-inch seam allowance thus closing the gap and finishing the washcloth.
Repeat these steps for the second set of 10-inch squares to make your second washcloth.
Preparing the Hood
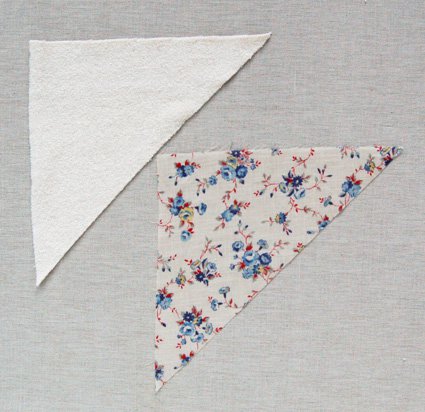
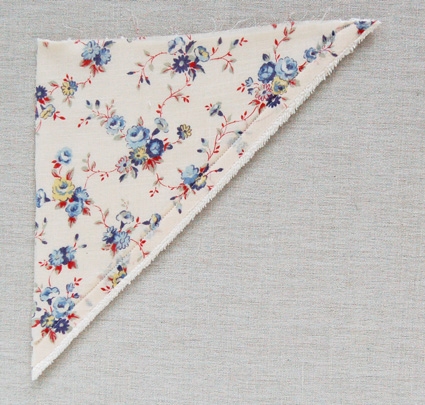
Cut the 12-inch squares you prepared in the first step in half diagonally, and just keep one of the resulting triangles from each fabric. You can hold on to the other set of triangles to make another towel or in case you mess this step up.
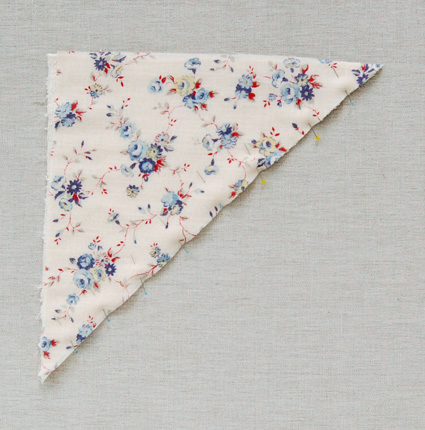
Pin a Terry Cloth triangle and a Sheer Floral triangle right sides together along their diagonal side.
Sew along this diagonal line with a 1/2-inch seam allowance backstitching at the beginning and end of each seam.
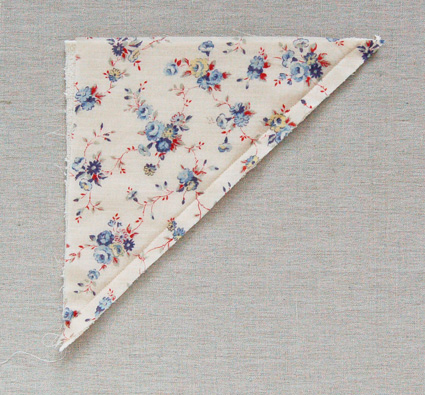
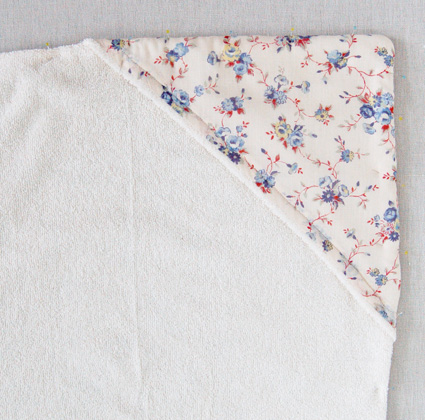
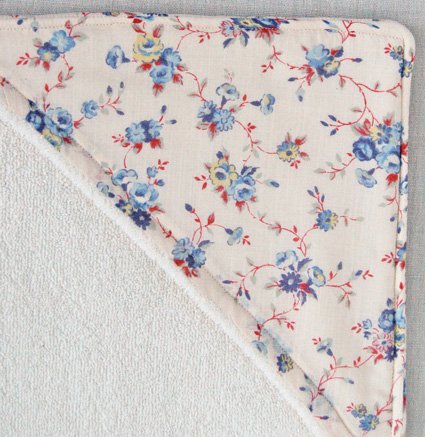
Turn the triangle right side out by re-folding it along the diagonal line wrong sides together. Iron and pin the piece along this diagonal side letting the fluffy part of the Terry Cloth peek out a bit onto the Sheer Floral side.
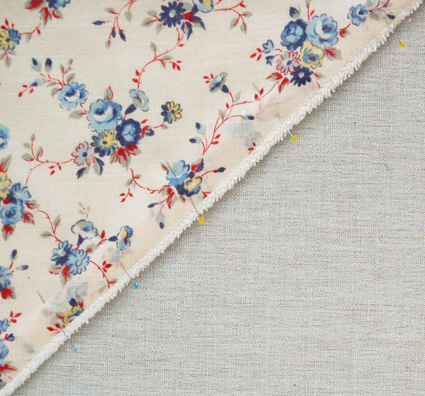
Here is a closer shot showing the diagonal side and the Terry Cloth rolled slightly over to the Sheer Floral side.
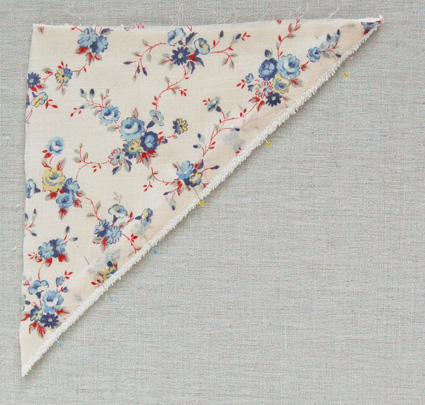
Sew the sides together along the diagonal line with a 1/2-inch seam allowance.
This triangle is now the hood piece.
Sewing the Towel Together

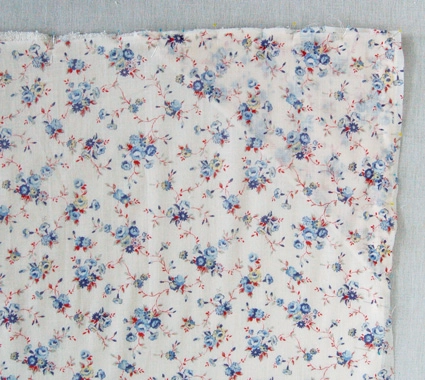
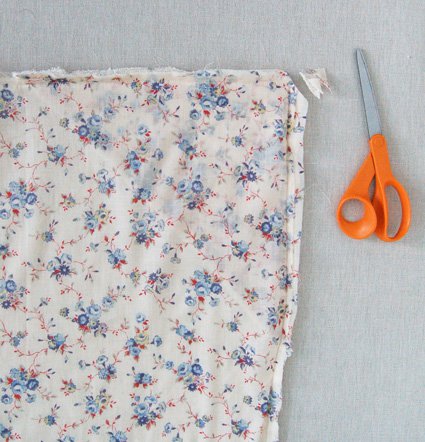
Pin the 32-inch square pieces of fabric right sides together along all four sides. Smooth the Sheer Floral down on top of the Terry Cloth as flat as you can. If there are any sides that aren’t matching up you can trim them.
Once all four sides are pinned un-pin one corner and peel the sheer floral back.

Place the hood piece onto this corner, matching its right angle to the right angle of the Terry Cloth, with the Sheer Floral side of the hood facing up.
Smooth the Sheer Floral back on top of the corner and pin it down neatly, matching up the right angles. Make sure you’re pinning through all four layers, The Terry Cloth towel piece, the two layers of the hood, and the Sheer Floral towel piece.
Sew along all four sides of the towel with a 1/2-inch seam allowance leaving a 3-inch gap unsewn.
Snip off the corners of the piece.
Turn the piece right sides out and press the sides just like you did for the washcloths.
Press the towel flat and pin along the sides just as you did with the washcloth.
The hood should be sitting on top of the Terry Cloth side of the towel with it’s Sheer Floral side facing up.
Finishing
Sew along all four sides of the towel with a 1/4-inch seam allowance. This will close the 3-inch gap and give the whole piece a more finished look. Start at the bottom right corner of the hood. That way if you mess up sewing the edge of the hood you don’t have too much to rip out!
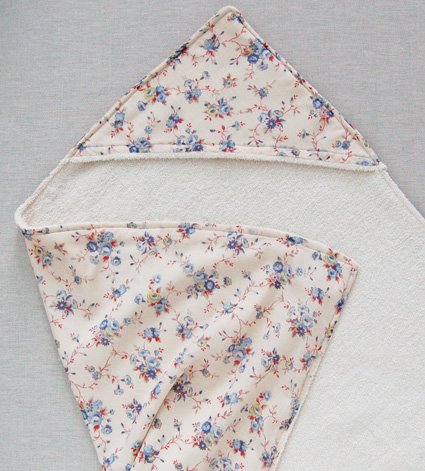
Once you’ve sewn around all four sides of the towel press it again and you’ll be all done!


thanks for this molly!
http://mixtapezineblog.blogspot.com/2010/05/craft-action.html
Love this set! Will definately have to make one. Very cute baby picture, too!!
It´s so sweet. I will sew one to my baby.
Absolutely lovely! Your tutorial was so helpful. Thank you for taking the time to photograph and post it.
I love the fabric – nice choice. Very cute baby too!
Love the fabric and design! I have a question though…Could I use a towel from the store and just sew on some cute cotton fabric to one side? Thank you! And thanks for the tutorial!
Hi,
This looks adorable! My question is: do the two layers separate or slip around on top of each other easily (the sheer fabric and the terry), and would this cause any inconvenience when actually using the towel or washcloths?
Would some stitching over the expanse towel be a good idea to keep it together or would this be a bad thing to do?
Thanks!
I just made this and I'm SUPER pleased with how cute it turned out! Thanks so much for an easy tutorial!
Christina, what material did you use for the floral part? Would cotton work (i think it would need ironing once washed)
Hi Melody,
Thanks for writing in! You can use any lightweight fabric here. Liberty of London would be quite nice here! You can certainly try a quilting cotton but it is quite a bit heavier than what we used here and may not work as well. I would suggest sewing up a small sample (a few inches by a few inches) and see if it works before moving on!
Best,
Cassy
I just made this with Alexander Henry Traffic Jam and it turned out really well, as long as you don't examine the seams too closely 🙂 It was my second sewing project and I didn't find the terry cloth too difficult to work with. It is a gift but I gave it a test-run and it worked just fine, although I think some stitching on the towel might make it easier to use. The washcloths are small so that wasn't an issue. Here are two photos:
http://flic.kr/p/8GNrQJ
http://flic.kr/p/8GNrvu
Hi Brooke-
It's so cute! Thanks so much for sharing your pics.
– Molly
Just whipped this number up and I'm totally pleased! I omitted the outside stitching though, because I liked the look of it. I'm sending this to an old friend who's just having her baby today! Gotta whip up a few more things, and then its off.
Here's a picture, and thanks!
http://www.flickr.com/photos/74151125@N00/5057936042/
I've made four of these now, and love them! I do find that the layers of fabric slip, so after the initial washings they don't look as cute unless you iron them flat. Which, of course, no new mommy has time to do! However, it's still a really sweet project to make as a gift, and it still gets my baby dry, so I can't complain!
I have already made 3 of these and they've all been a big hit! My cousin liked the one that I made her newborn so much that she's requested that I make larger versions for her 2 older girls for Christmas! Thanks for all the great projects!
Thanks for the tutorial! I made this, and it was cute. http://ronandjana.blogspot.com/2011/04/baby-needed-towel.html
I see this tutorial calls for 'Michael Miller Organic Terry Cloth'. Is this the same as 'Michael Miller Sherpa'? Not sure which product to use.
These are new words to me so thanks for clarifying.
I was wondering if this project would work for a toddler? I had a towel like this as a child and I want to make one from my 18 month old nephew. Is this big enough as is, and if not, do you have any suggestions on how to adapt the size?
Thanks,
Jessica
Hey Jessica,
I've made this towel NUMEROUS times. I usually make it for all my friends when they have their baby and it's pretty good sized. My cousin liked hers so much that she asked me to make one for each of her girls (3 and 5). Since they original pattern is square anyways, just alter the pattern sizes and I'd say add and extra 2 or 3 inches along each side and it'll be PLENTY big to keep a kiddo dry well into their double digit years 🙂
Happy sewing!
Great tutorial… your baby towel's lovely and very neatly done.
I have posted links to one of your tutorials on my blog. Please let me know if you would like me to remove it and it will be done right away. Thank you for your tutorial! Thanks! Ginger
Hi Ginger-
It's totally fine to link to us in this way, thanks for letting us know!
This is so lovely! What a sweet idea and really clear instructions too!
Very nice towel for children and a detailed explanation.
I will try to apply all This projects you posted
Thanks again Molly
If you have a walking foot attachment with your sewing machine, now might be a good time to use it. It doesn't stretch the terry cloth as much.
I just made a set for a new Momma – thanks for the tutorial!
Thanks so much for this tutorial… I'm making it for a baby shower I am hosting this weekend and I am so excited to see how it turns out! I still fell like I'm a beginner with my sewing machine, so I really appreciate the step by step pictures. Thank you again!
Can you use something other than the Sheer fabric? Why or why not? And if so what other kinds of fabrics could you use?
Hi Amanda-
You can use any light weight lawn or quilt weight fabric that you like!
Thank you for your question!
Molly
I think my question was just answered, but just to be sure, would flannel not work as well as a lightweight fabric? Such a cute pattern, thank you!
Hi Karine-
Yes, flannel would work fine.
Thank you!
Molly
So I'm almost done. I've done every step except for the outside border. I used flannel to match the baby blanket I'm making for my new niece. I think with the heavier weight it definitely needs to be sew together. Next time I'll just try to find a co-ordinating lighter fabric next time and see how that goes. Thank you so much for the awesome & cute baby towel.
Thanks for this tutorial, I just finished making a set for my new niece/nephew arriving soon. I used yellow flannel with elephants on it and cut up a new soft towel as I couldn't find any nice towelling. It's turned out pretty well and I know my sister will love it! Thanks again !
I loved this so much! i made some slight changes to the measurements.
For an older child, I buy 1 1/2 yds of 44" wide terry cloth to make the square and use half of a purchased washcloth cut diagonally for the hood. Although I just turn the edges of the terry cloth to finish, I really like the look of a second fabric. I also cut out large letters of the child's name in bright cotton fabric and machine embroider (satin stitch) those letters on the back of the towel. Grandkids use those towels for years!
I am so excited to make this for my baby on the way! I love the floral fabric you used. I've been scouring the internet and I can't find the same one 🙁 any idea on where else I could find it?
Thanks a lot for this tutorial! I’ve done the baby towel, you can see the result here:
http://fildeleaufildelo.canalblog.com/archives/2014/08/19/30442908.html
All the best!
Should the fabrics be washed and dried before cutting and sewing?
Hi Jess-
Yes, definitely!
Thanks for your question!
Molly
I love this idea, I am making a few for baby shower gifts. Very Simple to follow. thanks for sharing this idea and patteren
I want to download these details
Hi Neelam-
You can print, save, or download any pattern on our site by using our print button.
If you’re on a desktop version of the site, you will find a “print” icon in the right column just below the date and tags. If you’re on a mobile version of the site, you will find a “print” icon below the pattern and above the comments.
Follow the easy on-screen instructions for customizing what parts of the pattern you want to delete for saving or printing (for example, certain images or the list of materials).
Thanks for getting in touch!
Molly
thank you can use for new great grand babies
I MADE ONE FOR MY NEW GRAND BABY… VERY EASY , CLEAR
INSTRUCTIONS… THANKS!
Easy to follow pattern….thanks for sharing
What a fun project! Nice and easy, turns out adorable! Thanks!
I made these; it was wonderful! Thank you for wonderful directions!
your pattern was most helpful of all the patterns I
have seen. Thanks.
I just made this for my grandson. This is a great pattern! I was going to make bias and really didn’t know what to do for a towel for the baby.
This was easy and looks so good ! Thanks a lot !
Love the patterns such a quick and fun project. Thanks
I made two for my yet to be born grand daughter. Can’t wait to meet her. I used flannel and terry cloth for one and quilting cotton and terry for the second one. They were so easy and look so cute. Thank you so much for the tutorial. So easy to follow
I just made this for my baby nephew, it matches the quilt I made when he was born. It is so cute and was easier than I expevted.
Thanks for the pattern!
James
Hi Jamed,
Did you use sheer fabric like the original post? Do you think the contrast fabric can be cotton?
Hi Christine,
Thanks for writing in! You can use any lightweight fabric here. Liberty of London would be quite nice here! You can certainly try a quilting cotton but it is quite a bit heavier than what we used here and may not work as well. I would suggest sewing up a small sample (a few inches by a few inches) and see if it works before moving on!
Best,
Cassy
It’s a cute idea for a gift! So cute… can’t wait to make it!
Très joli cape de bain facile à faire
merci pour partager ce tutoriel
Made this for my new grandson, Oscar, and I’ve been asked for another one by my daughter-in-law as he seems to love being wrapped in it so much. Thank you
Hello Brenda,
Thank you for sharing your story! It is always a pleasure to hear of our patterns out in the world.
Happy knitting!
-Marilla