Cable
Cable stitches are a decorative technique with the appearance of a twisted rope or a braid. Making cables is much simpler than you may think, and even beginner knitters can make beautiful cabled patterns. The basic concept is to work your stitches out of order, effectively overlapping the fabric. To do this, you put a certain number of stitches on hold (holding them either in the front or the back of the work); then you work a stitch or more from your working needle; and finally, you return to the on-hold stitches and work them. The only equipment you need is a cable stitch holder for your on-hold stitches, or you can use a spare double pointed needle to serve the same purpose.
Cables come in all shapes and sizes. Changing the number and orientation of the stitches, as well as the frequency in which you work a cable row all effect the look of your cable. Holding stitches to the back creates a right-leaning twist in the fabric, and holding stitching to the front creates a left-learning twist. Below we demonstrate the basics by first showing a 6-stitch cable held to the back (C6B), then a 6-stitch cable held to the front (C6F).
C6B: Cable 6 Back
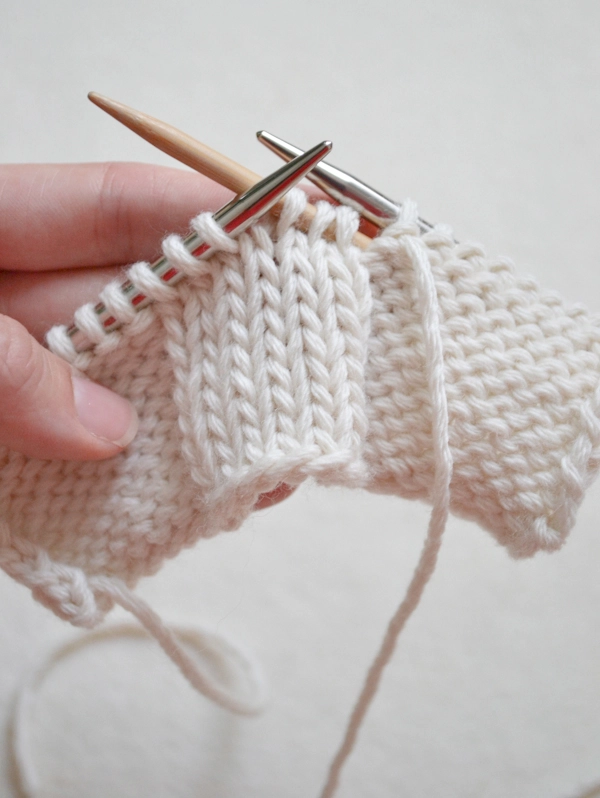
Slip 3 stitches purlwise onto a cable stitch holder and let them hang in the back of your work. (“Purlwise” means to insert the right needle into each stitch as if you were purling it.)
Knit the next 3 stitches from your left working needle.
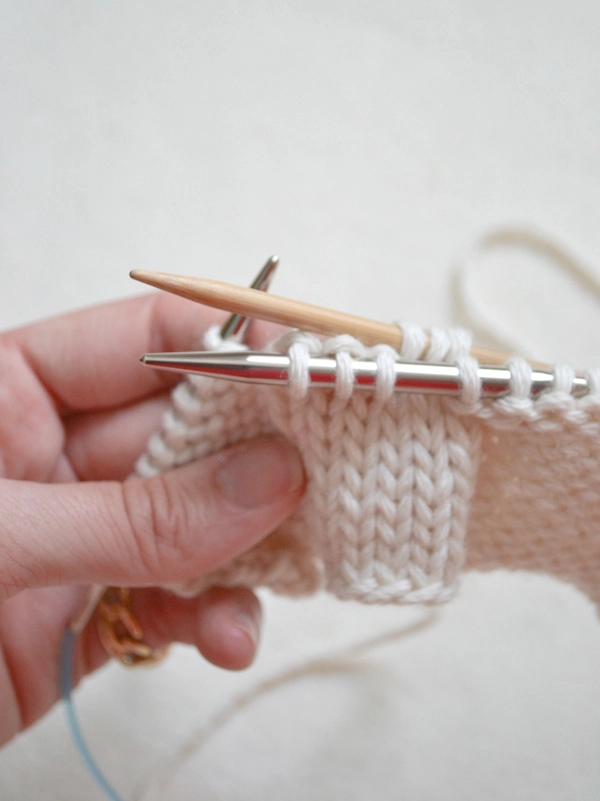
Then, sliding the 3 on-hold stitches to the right end of the cable stitch holder, knit the on-hold stitches.
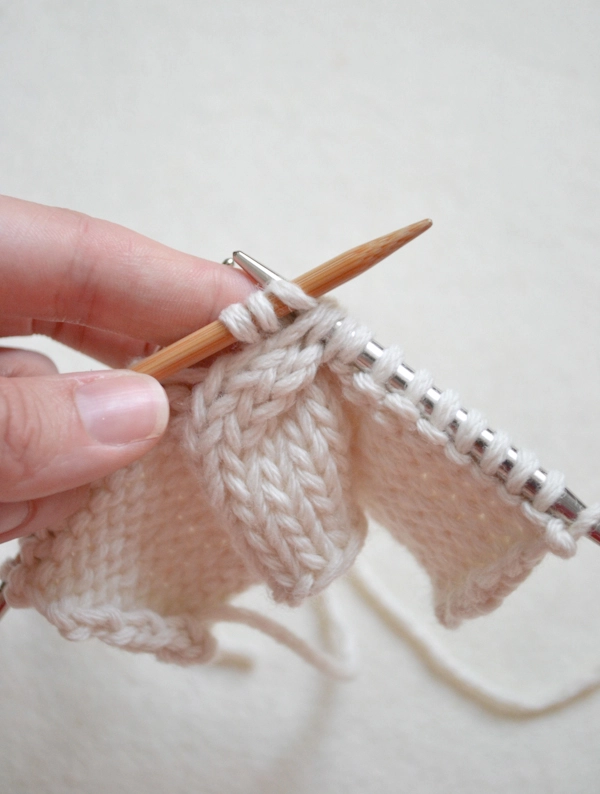
Continue to follow your pattern until your next cable row!
C6F: Cable 6 Front

To cable to the front, follow the instructions above, except after slipping 3 stitches onto the cable stitch holder, bring the on-hold stitches to the front of your work, rather than the back. Knit the following 3 stitches from the left working needle, then knit the 3 stitches from the cable stitch holder.
3/1 LPC + RPC (3/1 Left + Right Purl Cable)
We used the following cables in our Traveling Cable Hat pattern. They may come in handy elsewhere too!
3/1 LPC (3/1 Left Purl Cable)
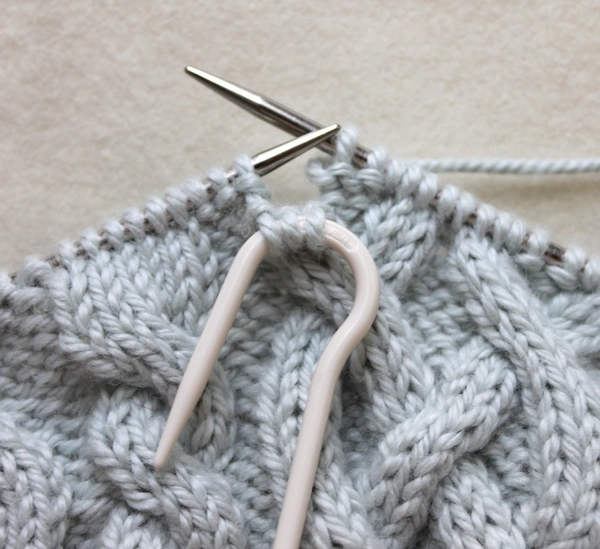
Slip the next three stitches purlwise to a cable stitch holder. (“Purlwise” means to insert the right needle into each stitch as if you were purling it.)
Keep the cable stitch holder at the front of the work.
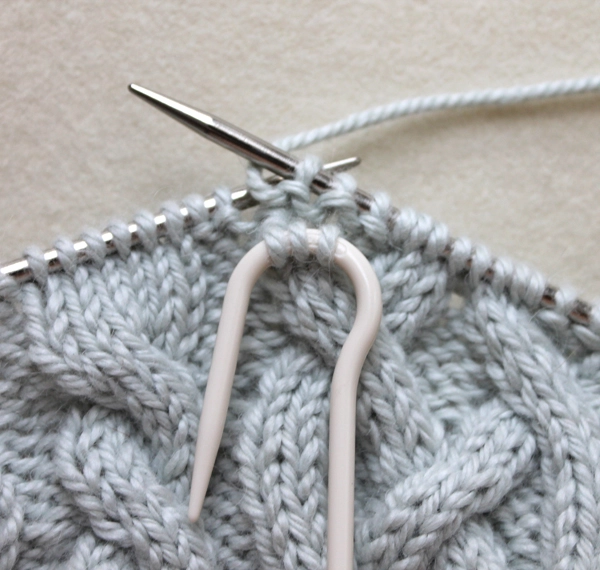
Purl one stitch from the left needle.
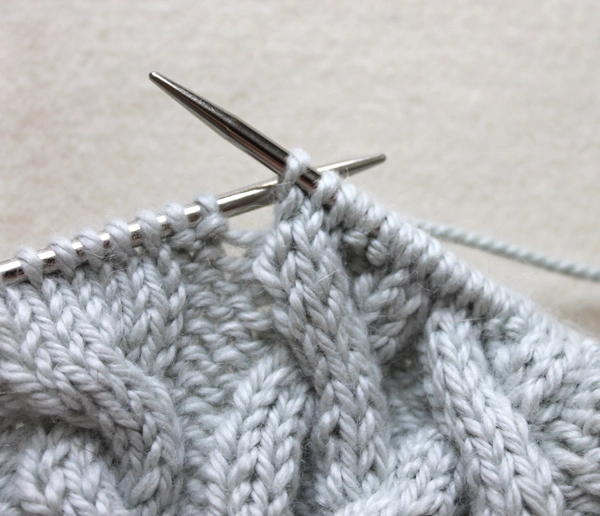
Slide the slipped stitches to the other end of the cable stitch holder. (Do not spin the stitch holder or try to knit the stitches from the same end that you used to slip the stitches.) Now knit the 3 stitches from the cable stitch holder.
3/1 RPC (3/1 Right Purl Cable)
Making the Right Purl Cable is like making a Left Purl Cable in reverse. You…
Slip the next (purl) stitch from the left needle onto a cable stitch holder; hold the cable stitch holder to the back of your work; knit the 3 next stitches from the left needle; slide the on-hold purl stitch to the other end of the cable stitch holder and purl it.


C’est très bien expliqué, le travail est très beau. Merci
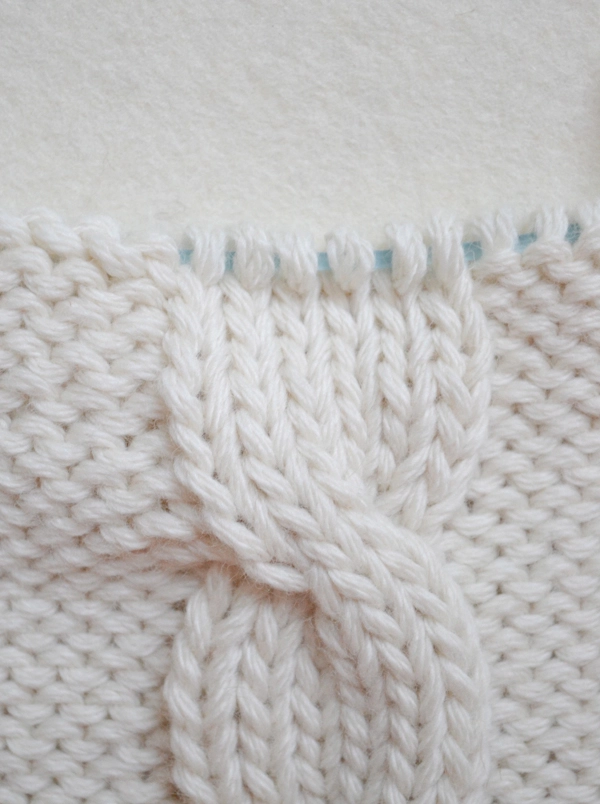
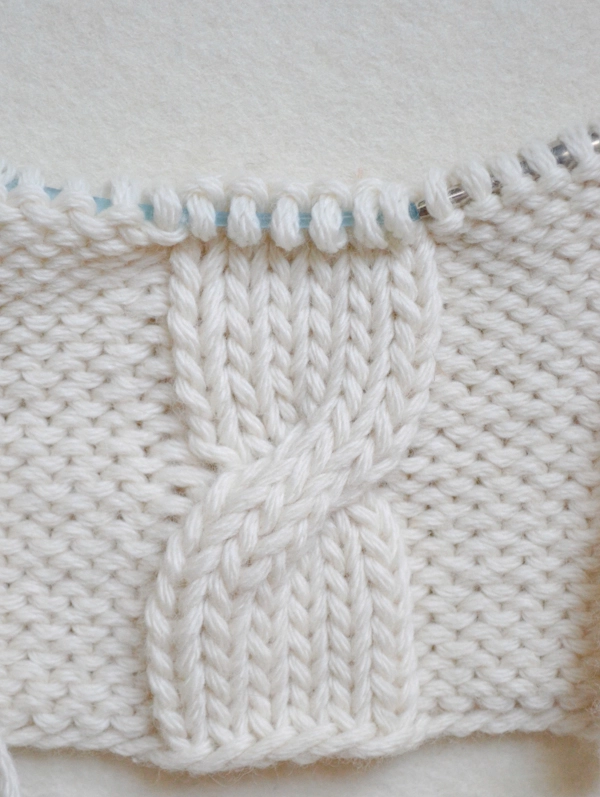
I would love to know how to do the cable in the very first picture. It just seems to flow.
Hey Mary An Kelly,
Thank you for your comment! That cable is used in our Cable Back Shell project. Here is a link to the project with the instructions to make the cable; https://www.purlsoho.com/create/2013/06/30/lauras-loop-cable-back-shell/
Happy knitting!
Jake
I really enjoy your tutorials. I have been knitting for 2-3 months and when I read this the other day I went right home and tried to replicate the 22 stitch cable at the beginning of the tutorial. Needless to say it wasn’t that lovely but I think I’ve got the idea. Thanks for the clear tutorials that are both visually simple and lovely.
what does make 1 right and make 1 left mean?
Hello, Irma!
Thank you very much for writing in! We’ve got a wonderful tutorial here: p://www.purlsoho.com/create/2013/08/13/make-one-right-m1r-make-one-left-m1l/ the Make 1 Right + Make 1 Left stitch. Please let us know if you have further questions!
Happy knitting,
Kumeko
okay I will wait for response.
Any helpful hints on how to keep your cables balanced?
Hello Noel,
Thank you for reaching out! Keep the cables balanced in the sense that your cables or stitches are uneven? This could be a tension issue which will get better with practice as your hands become more comfortable with with this technique. Tension issues can also often be fixed during the blocking process.
I hope this helps and let us know if we can clarify anything!
Happy cable-ing
-Marilla
My cable pattern is over 18 stitches with a twist left and right , six stitches for each twist over two rows. There four rows between the double twist.
The cables are not lying flat. They looked pinched or too tight.
Any suggestions as to why?
Thank you!
Hi Martha,
Thanks for reaching out! Although I can’t say for sure without seeing your work, it sounds like this might be normal. Because you are crossing stitches over other stitches, it is normal to have a tight spot right at the twist of the cable, and although it will never lay perfectly flat, usually they look much more organized and lay significantly flatter after blocking.
I hope that helps!
Julianna
Thank you Julianna and Cassy!!!
Sounds like a lovely tutorial. When you knit, do you knit a knit stitch untl the point where you take the three stitches off, then work a purl stitch until the cable is done and then continue a knit stitch, then alternate the next row, like a ribbed stitch? Im only a beginner and my question sounds confusing but does anyone know the answer? thanks
I have tried this and it seems to work great, a bit fumbly but after all I’m a beginner, only 11-years-old (congrats! If an 11-year old can follow this tutorial anyone can ? ) so im sure I’ll get the hang of it soon. However the fabric curls in where the overlap row is, why does this happen and how can I fix it? Thanks
Hi Emily
Thanks for writing in! I think you’re asking about the Left Cross (LC) cable here. Usually, on cabled projects, the following rows are knit in pattern, so you would knit your knit stitches and purl your purl stitches. But cables come in all shapes and sizes, so each pattern that includes cabling should give you the instructions at the beginning: how to do the specific cable they require, exactly what to do on the following rows and how many rows between the cable rows. Most cables are bordered by stitches on each side and don’t start on the very edge. But all cables generally pull the fabric of your knitting in (all the crossed stitches) I hope this helps!
Happy knitting
Jessica
I am doing a cable 6 back and it tells me to hold 3 at back,knit 3 from left kneedle then purl 1 then knit 3 from cable needle this I am ok with but there are not enough stitches left to to finish pattern I am so confused
Hi Jean,
Thanks for reaching out! I am happy to help but would like some more information to continue, what pattern are you working on?
Looking forward to your response!
Gianna