Felt Snow Ball Ornaments

Twinkling lights on park trees and glass balls hung in shop windows, little by little it’s beginning to look a lot like Christmas in New York City! I know some people can be a bit Grinch-y about the commercialism of the holiday season, but it’s hard to resist the special feeling of Christmas in the city. It’s contagious!

Inspired by this burgeoning holiday cheer, we’re starting to feather our holiday nests with these lovely felt ornaments. Laura designed an elegant 3-dimensional Felt Stars that will look equally beautiful hung from a doorway or perched atop a tree. And Molly designed a set of graceful Felt Snow Ball Ornaments that will add a playful Christmas feeling to your tree or mantle.
Felt is our favorite ornament-making material because it’s soft, natural, and so easy. Ecru is especially lovely because it’s peaceful, classic, and reminiscent of a fresh blanket of snow. And to add a little holiday sparkle we accented our ornaments with the beautiful new DMC metallic thread.
ps. The how-to’s for Laura’s Felt Star Pendant and Tree Topper are right here. And merry Christmas!
Designed by Purl Soho designer, Molly Schnick. Click here to see even more of Molly’s work!
Materials

To make an assortment of 1 1/2-inch and 2 1/2-inch ball ornaments. You can make 6 large ornaments, or 12 small ornaments, or an assortment of 4 small and 3 large ornaments:
- 1 18-inch square of 100% wool felt in ecru
- Silver Metallic DMC Embroidery Floss
- 100% cotton thread in color 1140
- A Snow Ball Ornament template available for free download here, printed and cut out.
Pattern
Cutting

The small and large ornaments are made in the exact same manner.
Cut eight small or large templates neatly from the ecru felt.
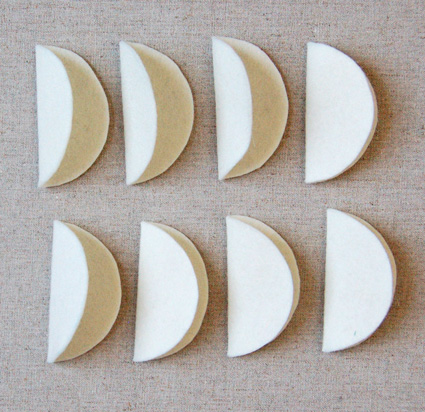
Press each of the cut circles in half, making a neat crease down their centers.
Sewing

Start with two of the folded pieces with their folded sides facing one another.
Thread a 24-inch length of the cotton thread and tie a knot at the end. Starting at the outside of the top of the fold of one of your circular pieces pull the needle through to the inside of the fold. This will insure that the knot is on the inside of the ornament.

Then begin sewing the two pieces together along their crease lines with a small running stitch. The center meridian in the picture above, where the two folded edges meet, will be referred to as the center channel from here on out.

Make sure your needle is entering and exiting exactly on the fold mark of both pieces.

Sew across the entire fold mark. Do not cut your thread or tie a knot at the end.
Next fold the sew pieces closed and place two more pieces on top of them, opposite from one another with their creased center markings each lined up with the center channel.

Sew these two new pieces together along their center fold lines in the same manner. Try to sew through the center channel not catching the folded edges of the first two pieces. (If you catch a little of the edges it’s no big deal.)

Sew to the end of the folded creases but do not cut your thread.

Arrange the ornament with all the circles folded closed with two folded circles on each side and the center channel in the center. Place two more circles opposite one another with their creases lining up with the center channel.

Sew these two pieces together through the center channel.

Repeat this process for the final two creased circles, sewing them on opposite to one another through the center channel.

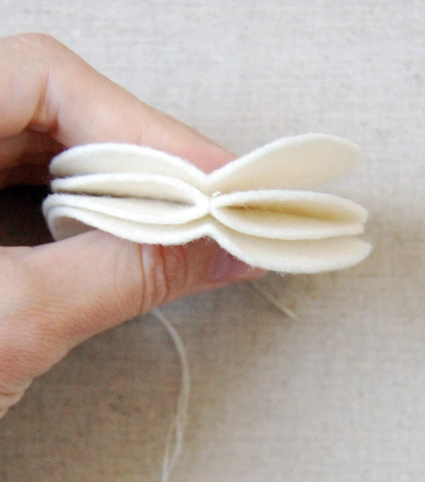
Fluff out your 16-petaled snow ball like so.
Finishing

Cut an 18-inch length of the silver embroidery thread and separate it into two pieces of three strands each. Thread an embroidery needle with one of these pieces and tie a knot on the end. (You can use the left over piece for the next ornament.)
Insert your needle into the center channel in-between two of the piece’s folds.

Pull the needle through to the top of the ornament thus hiding the knot in the center channel as shown above. You’ll still be able to see the knot a little but it won’t be noticeable once the ornament is done.

Sew a stitch along the top of one of the the center creases into the opposite center crease

Repeat this all the way around the top of your ornament, stitching across the top from one center crease to each opposite center crease.
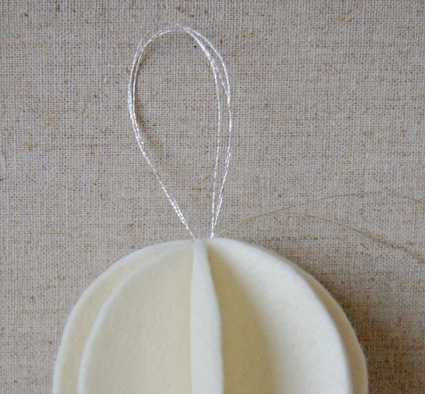
Once you’ve gone all the way around pull your needle through the top silver stitches to create a 1 1/2-inch long loop.

Twist your working thread tightly around the bottom of the loop five times and then tie it in a small knot at the bottom of the twists.

Pull your needle through the very top of one of the creased circles and snip it off thus hiding the end.

Unfold all of the petals and arrange them so they are all relatively even and you’re all done!


So cute Molly! Now I just need to make like twenty for my tree!
Gracias por compartir me encantan, son preciosas =)
these look perfect for my tree this year with a toddler and a kitten in the house!
Have you thought of beading the exposed edges of each or every other “page” of the ornamen?
What a lovely idea to do Christmas Ornaments in felt! My grandson will be spending the Holidays with us and I will make a number of ball ornaments for him to hang on the tree. Excellent picture tutorial! Thank you very much.
Thank you, fab tutorial x
this is great, i was planning on making a christmas tree with self-made ornaments only…. i just finished one felt snow ball and it is looking fabulous… thanks so much.
I just spent the afternoon watching “Home Alone” and making these ornaments. I know it's not yet Thanksgiving but I just had to have a Christmas-crafty day! They turned out beautifully.
Love these and have tried making them but I think my felt was too thin. Should they be made with a thick felt?
Hi Zoe-
The felt should be 1mm thick. You can see it here: https://www.purlsoho.com/purl/products/item/6409-Wollfilz-1-mm-precut-Wool-Felt
Thanks for your question!
Molly