Easy Drawstring Bag

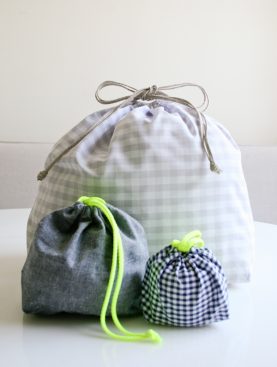
We made this simple drawstring bag to hold colorful felt jelly bean bags, but it can be used for a wide range of things. A custom gift wrap alternative, a travel bag, a knitting project bag and the list goes on and on. It sews up in less than an hour and works with any kind of fabric. A perfect use for those fabric scraps you’ve been wondering what to do with.
If you’d like to make some of the cute felt “jelly beans” pictured above you can find the Wool Felt Jelly Bean pattern right here!
Update: New Fabric
December 2019
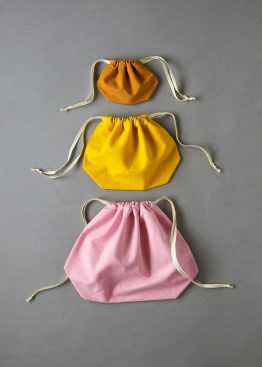
We revisit our Easy Drawstring Bags whenever a fabric strikes our fancy, and this newest incarnation in our garment-dyed Spectrum Cotton may be our most joyful yet. There are so many beautiful colors that picking the palette is like growing a fairy forest of toadstools! View the updated versions here!
Update: New Fabric
APRIL 2016
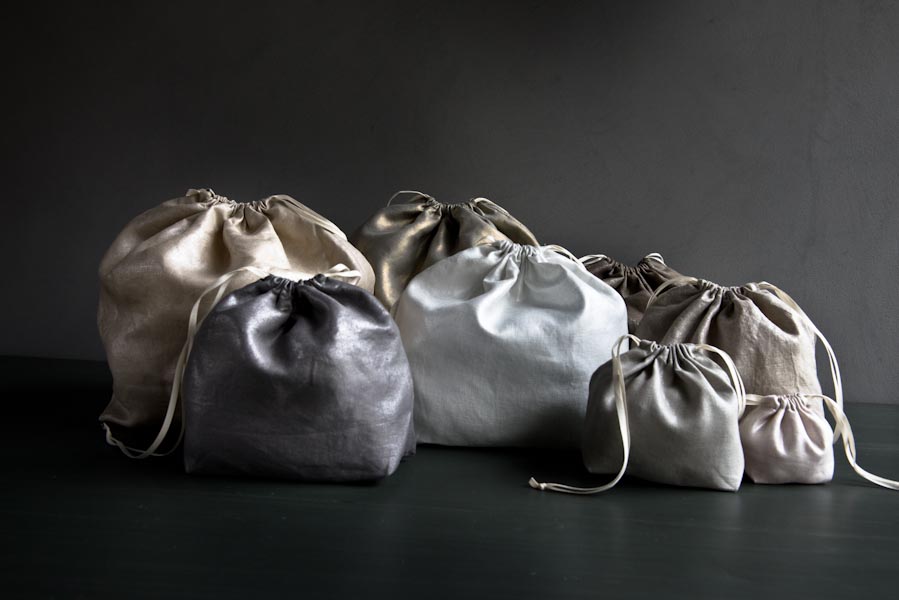
For a pretty new version of our Easy Drawstring Bags, we used Purl Soho Mineral Linen. In this shimmering fabric they are transformed into mysteriously gorgeous little treasures! To see the materials go to our Easy Drawstring Bags in Mineral Linen story here!
Update: New Fabric
JUNE 2015

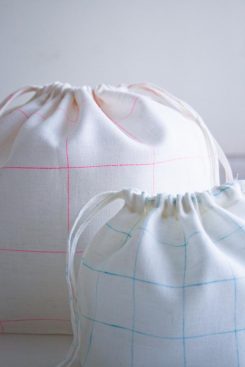
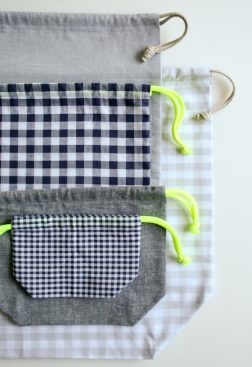
For a new version of our Easy Drawstring Bags, we used our Linen Grid fabric for the bag itself and also to create the drawstrings that pull the whole thing together. In Linen Grid, the finished look is crisp and modern!
Update: New Sizes
JULY 2012
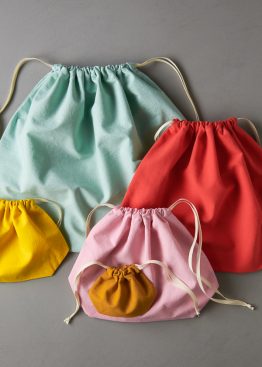
We updated this pattern with 4 additional sizes and stitched it up in some of our very favorite fabrics. To see more photos and a full list of materials, visit our Easy Drawstring Bag: Four New Sizes post. The pattern here reflects these changes!
Materials
To make a X-Small (Small, Medium, Large, X-Large) drawstring bag:
- 1/4 (1/4, 1/2, 1/2, 1/2) yard of fabric.
- 2 (2, 2, 3, 3) yards of trim.
- 100% Cotton Thread that blends with chosen fabric
- Non-slip Ruler
- Rotary Cutter
For our original Easy Drawstring Bag, pictured here in this post, we used…
- 1/2-yard of Seven Islands Tulip damask upholstery weight fabric
- 2 yards of Carta Inc. alphabet brocaded ribbon in two letters
Sizes
X-Small (Small, Medium, Large, X-Large)
- X-Small: 5 1/2 inches wide x 3 3/4 inches tall x 2 1/2 inches deep
- Small: 8 1/2 x 6 1/4 x 2 1/2 inches
- Medium: 11 1/2 x 9 x 4 inches
- Large: 14 1/2 x 11 1/4 x 5 inches
- X-Large: 17 1/2 x 13 3/4 x 6 inches
Pattern
Cut
The Trim
Cut two 20 (26, 34, 42, 48) inch pieces of trim for each drawstring bag. Place these to the side for now.
The Fabric
Using your rotary cutter and non-slip rulers, cut a rectangle of fabric measuring:
- 6-inch wide by 12-inch long
- 9-inch wide by 18-inch long
- 12-inch wide by 24-inch long
- 15-inch wide by 30-inch long
- 18-inch wide by 36-inch long
For more help with this step, please see our Rotary Cutting tutorial.
Fold the rectangle of fabric in half the long way with right sides together to make a 6 (9, 12, 15, 18) inch square.
Sew
Starting at the fold, sew up the left and right side of the bag with a 1/4-inch seam allowance. Stop 2-inches from the top on each side.
Drawstring Channel

Working on only one half of the bag at a time, *fold and iron a 1/4-inch hem on the 2-inch portion of the fabric where you did not sew the seam (on the left and right sides).

Fold and iron a 1/4-inch hem along the top of the bag.

Fold it over another 3/4-inch as if to make a hem and iron (this will be the drawstring channel).

Sew along the bottom edge of the hem with a 1/6-inch seam allowance.
Repeat from * for the other half of the bag.
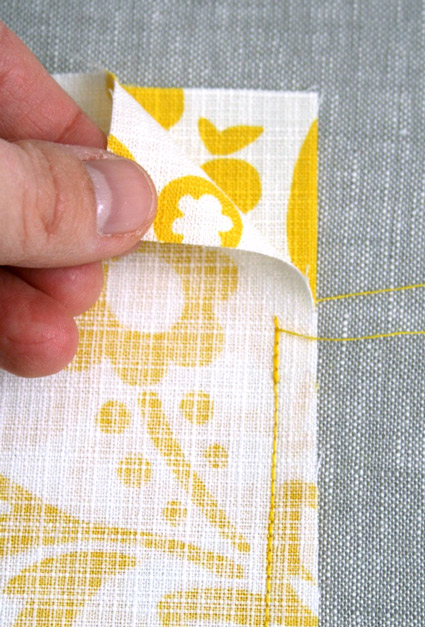
Make Gusset


Fold both corners of the bag so that the side seam of the bag is running exactly down the middle of the corner point. (Note: You will be sewing your gusset seam exactly perpendicular to the side seam.) You will want both gussets seams to be sewn at the exact same angle so that the gusset isn’t askew.

Line up one side of your non-slip ruler with the drawstring channel edge. Using your water soluble marker, draw a line approximately 1 (1 1/2, 2, 2 1/2, 3) inches down from the point of the corner. Repeat on other corner making sure your marks line up with the first corner.
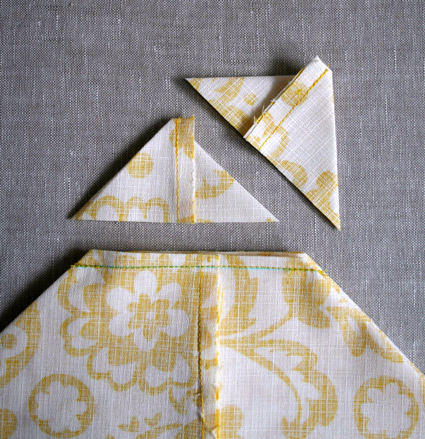
Sew along the marker lines. Cut off the fabric corners below the seam to reduce bulk. Turn the bag right side out.
Thread Ribbon Through Channel

Attach a large safety pin to the end of one of your alphabet ribbons.

Thread it through the drawstring channel on one side of the bag and then back around the other side so that you have both ends of the ribbon on one side. Repeat with the other ribbon starting on the opposite side of the bag. Leaving approximately 4 1/2 (4 1/2, 5, 5 1/2, 5 1/2) inches of the ribbon on either side, tie the ends in a knot and cut off excess.

The bag will cinch when you hold the knots on either side of the bag and pull outwards.
Enjoy!


Schöne Idee. Werde ich gerne ausprobieren. Die Stoffauswahl ist besonders gelungen.
hi. i am confuse how to get the free patterns.
Hi Kathy,
Thanks for reaching out! This pattern doesn’t require any templates or pattern pieces, as each bag is sewn from simple rectangles. You can find the dimensions of the rectangles above under the heading “Pattern” and “Cut,” and the sewing instructions are immediately below that!
Happy knitting!
Julianna
Awesome tutorial. Very easy to understand and follow. Thanks very much!
Thank you for this nice easy pattern. I needed a bag for my daughter to keep the bits for her new puppy in and this fitted the bill perfectly and was easy to make.
I HAVE CLICKED ON SEVERAL LINKS AND THERE IS NO PATTERN FOR THIS.
Hi Deavan,
Thanks for reaching out! The pattern can be found just above, under the heading “Pattern.” If you’re looking for a cutting template or printable pattern pieces, it isn’t necessary since the bag is so simple to make! Under the heading “The Fabric,” you will find dimensions of the rectangle to cut for each size of the bag.
I hope that clears things up!
Julianna
There’s no mention of how you use the trim that gets set aside at the beginning?
Hi Katie,
Thanks for writing in! This trim will be used as the drawstrings of the bag, and you can find instructions on how to insert them in the section titled “Thread Ribbon Through Channel.”
I hope that helps!
Julianna
Hi, Thank you for the tutorial. Do you have the explanation for the same bag but with double layer? I mean, with an inside layer?
Hi Maider,
Thanks for reaching out! We don’t currently have a version of the bag with a lining, but thank you for expressing your interest! I will be sure to pass this along to the rest of the team!
All the best,
Gianna
Obrigada, eu nunca achei um tutorial tão simples para o acabamento com passa-cordao. E vou praticar Abraços!
Thanks for this pattern! It’s so easy to sew and as a beginning sewist it’s a great way to become more familiar with my sewing machine and some basic techniques, but it’s odd that the seams are raw. Which seam finishes would work for this bag?
Hi Becky,
Thanks for reaching out about that. I’d recommend doing French seams, which will also work for this pattern!
All the best,
Lili