An Apple Picking Tote

This pretty, rustic, tote is made out of the most amazing loosely woven linen. It’s strength and durability make it the perfect accessory for a day of apple picking but you can use for carrying anything from groceries to books!
Designed by Purl Soho designer, Molly Schnick. Click here to see even more of Molly’s work!
Materials
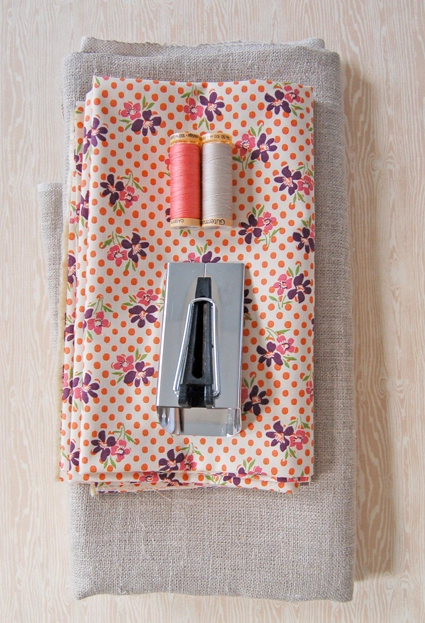
This Linen is such a beautiful natural fiber. It’s easy to work with and contrasts well with the pretty Floral Dot fabric.
- 1/2 yard of Globalweave Loose Weave Linen in Putty
- 3/4 yard of printed fabric for the handles
- A 2- inch (50 mm) bias tape maker
- One spool linen colored 100% cotton thread ( I used color # 3310)
- One spool 100% cotton thread to match your handle fabric
Pattern
Cutting
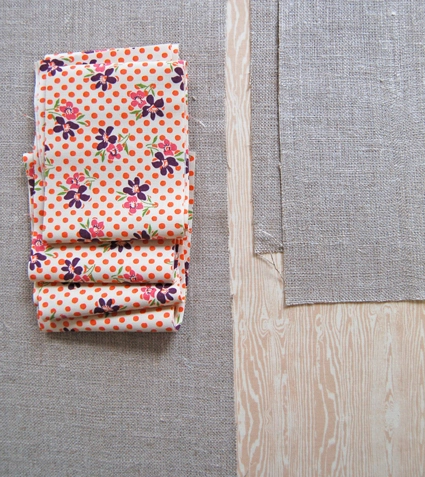
Cut the following from the Linen:
- one 17-inch X 34-inch piece
- two 14-inch X 6-inch pieces
Cut the following from the handle fabric:
- five 4-inch X 45-inch (the whole width of the fabric) strips (trim off the selvages)
Prepping
Bias Tape Handle
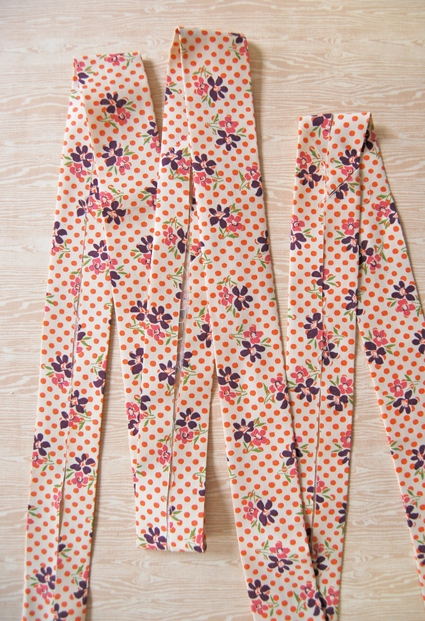
Then make the resulting really long strip into bias tape by following the instructions that come with the bias tape maker. If you want more instruction you can look at my Handmade Napkin Journal.
Handle Lining
Cut the other two remaining handle strips to 33-inches and iron them into two separate bias tape strips.
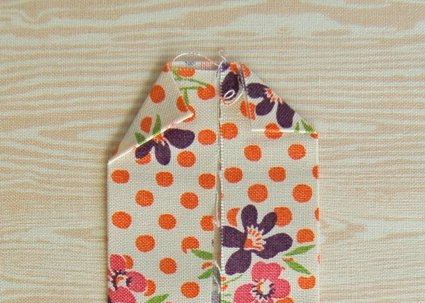
Fold the corners of each end in.
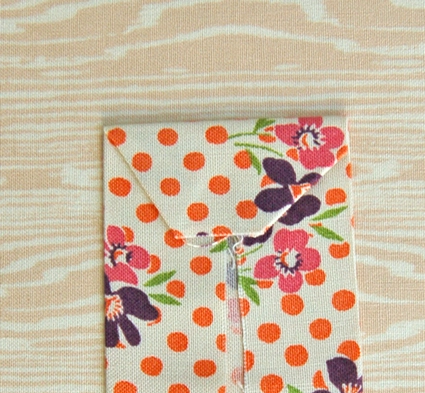
Then fold the end over 1/2-inch and iron it firmly down. Repeat for the other 33-inch bias tape strip and set them both aside, these will become the handle lining of the bag.
Bag Panels
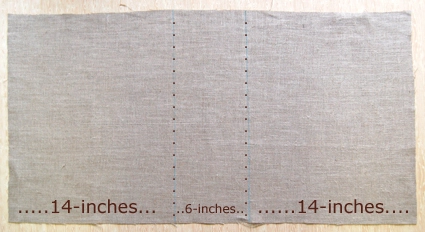
Mark your 17-inch X 34-inch linen piece, 14-inches from either 17-inch side, making a 6-inch stripe in the middle. This area will become the bottom of the bag.
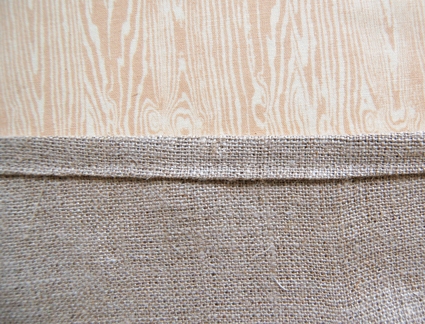
Hem both of the 17-inch ends of your larger linen piece with a doubled 1/2-inch seam allowance (fold it a 1/2-inch twice and sew it down). Remember to backstitch on all of your seams in this project.
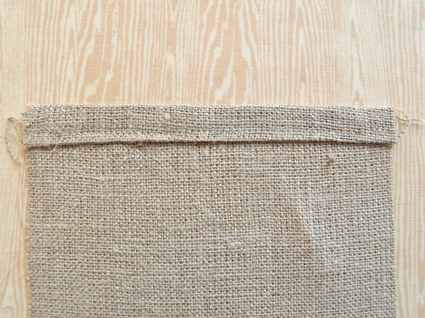
Hem one of the 6-inch sides on both of the smaller linen pieces in the same manner. These two pieces will become the bag sides.
Attaching the Handle and Handle Lining
Pinning the Handle
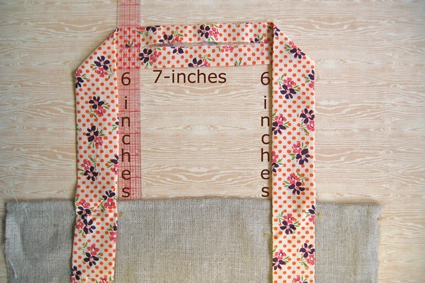
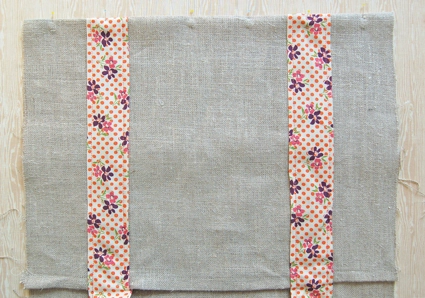
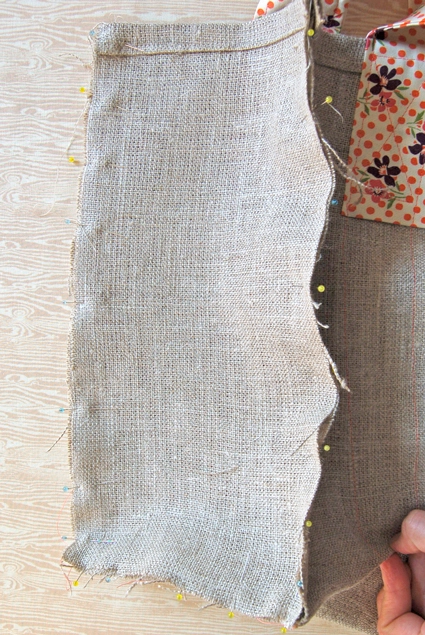
Turn the large linen panel so it’s right side is up. Starting at the marked bottom panel of the bag leave a few extra inches of bias tape and pin the bias tape 3-inches from the edge all along the long edge of the linen panel. Make sure to pin both the left and right sides of the bias tape. When you get to the top of the bag arrange the handles as shown above. Keep the bias tape perpendicular to the top edge of the bag for 6-inches then fold it perpendicular to itself. Run it parallel to the top edge of the bag for 7-inches and then turn it back down, perpendicular to the top edge. Keep pinning the strip 3-inches from the next long edge of the bag and arrange the bias tape for the second handle in the same way as the first.

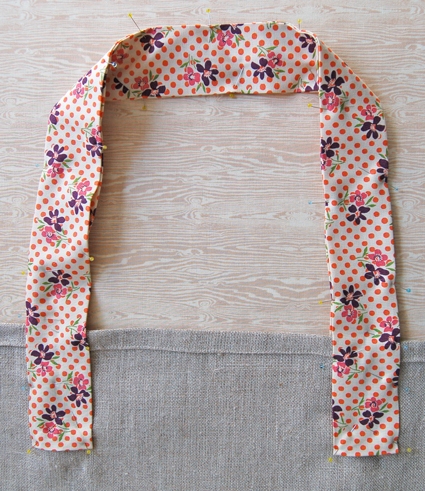
As you can see in the picture above the bias tape is pinned on in a large oval. When you get back to where you started leave a 3-inch gap and a few extra inches of bias tape, you’ll hide these ends later.
Pin the Handle Lining
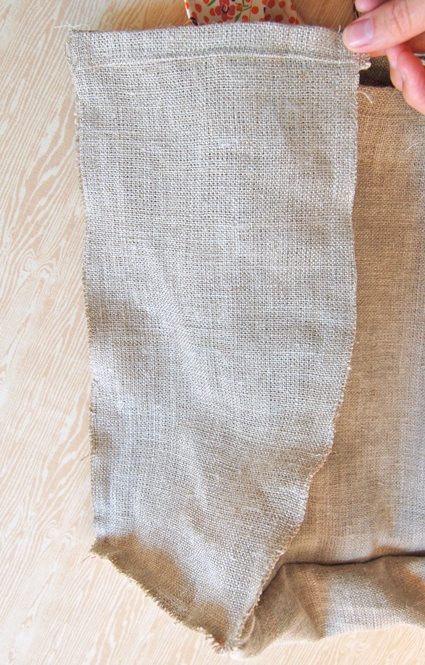
Turn the linen piece so wrong side is facing. Line up and pin one of the handle lining pieces of bias tape to the back of the main bias tape handle. Make sure it lines up through the linen and meets up exactly on the actual handle. Get both ends equally aligned on the back side of the panel as shown above. Repeat for second handle.
Sew On The Handle
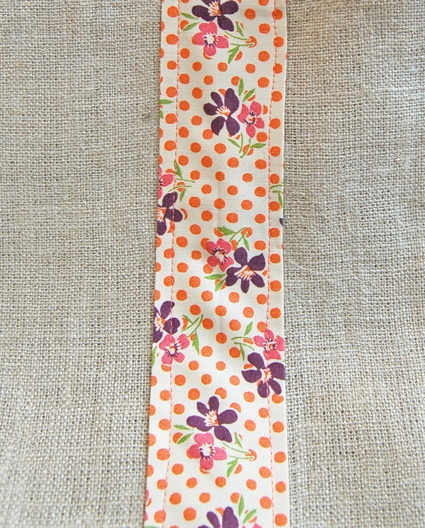
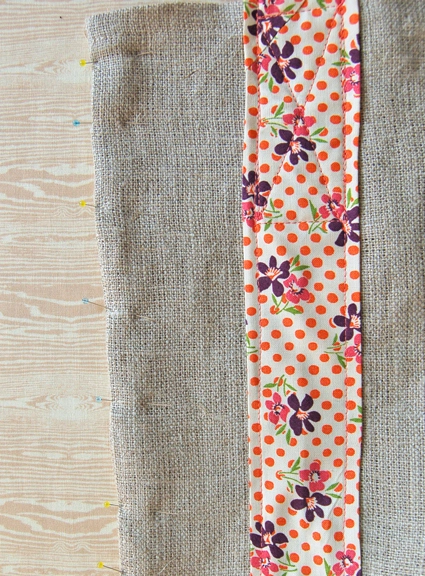
Sew the entire length of the handle to the linen panel using the brightly colored thread and 1/4-inch seam allowance on each side of the bias tape. Make sure to leave a 2 or 3-inch gap at start/ end point of the bias tape where you left the tails.
Draw a line (on the wrong side) at the midpoint where the two ends of the bias tape meet when laid neat and flat.
Pin these two pieces right sides together and sew them together along the marked lines. Clip the seam allowance to 1/4-inch.
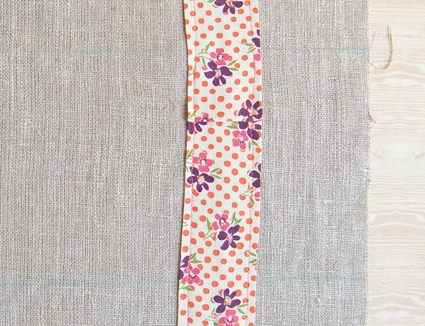
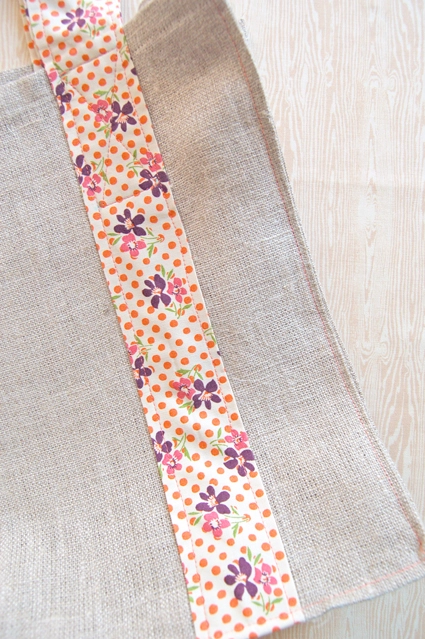
Turn the bias tape back to the right side and it should lay flat. Sew it down with a 1/4-inch seam on each side of the tape.
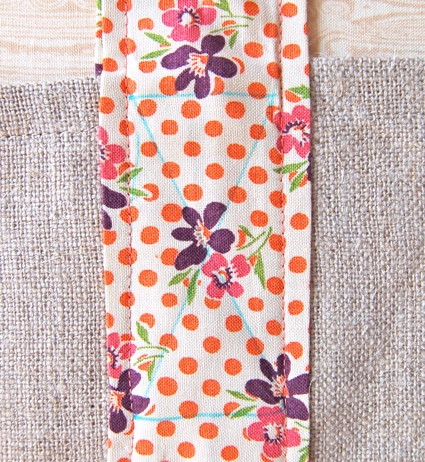
To further secure the handle and handle lining mark a 2 1/2-inch rectangle 1/4-inch below the top edge of the bag, using the side seams as the long edges. Then mark and “X” inside of the rectangle.
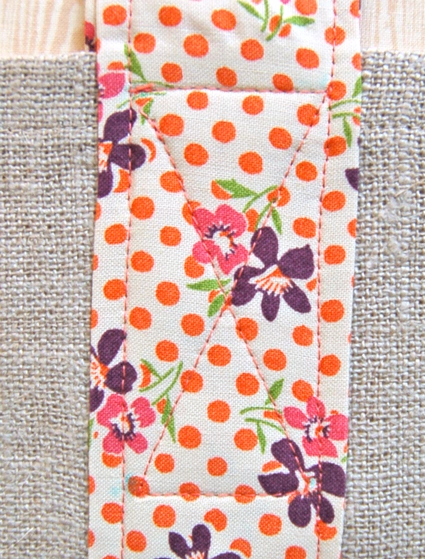
Sew this shape on in the following manner (so you don’t have to lift your foot): start at the top left corner, sew to the top right corner, sew down diagonally to the bottom left corner, then across to the bottom right, then up diagonally back to the top left corner where you began. Now the handle lining is sewn on nice and tight!
Forming the Bag
Iron along the two markings that indicate the bottom of the bag and pin them flat.
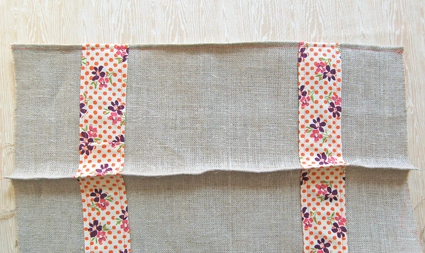
Sew them together using the brightly colored thread to form the bottom of the bag.
Turn the large panel inside out and pin in one of the bag side pieces right sides together. This is a pretty 3D process and can be a little confusing. Make sure the corners are lining up correctly and that none of the raw edges are poking through to the right side. Also make sure that the hemmed side of the bag side piece is at the top.
Sew the side on to the main panel with a 1/2-inch seam allowance using the linen colored thread. Then go back and zig zag stitch the raw edges of the seam so that the linen doesn’t unravel. Clip any stray threads and repeat for the next side of the bag.
Turn the bag right side out and iron it’s four vertical edges flat. Pin each edge together.
Top stitch with a 1/4-inch seam along the four side edges with the brightly colored thread and you’re all done!


It is a great design, but I’m wondering about your use of the term “bias” when referring to the handles. Bias refers to the fabric being cut on the bias-at a 45 degree angle to the grain of the fabric. According to your directions, you cut the handle pieces across the width of the fabric, along the weft-wise grain, and from the photos, the tape used to make the handles is surely not bias tape (with the grain running at a diagonal). This may seem nitpicky, but when the instructions are at odds with a basic sewing principle, it makes the process more confusing. I kept thinking I was missing something. It is good that you did not use bias fabric for the handles, because then they would be stretchy instead of firm, but it is an important point to be accurate about in writing the instructions. Thanks for your consideration of my comment.
Hi Katie-
You are correct and your point is well taken. We need to come up with another word for this non-bias “bias” tape for future projects… How about just plain “binding tape”? Thanks for your thorough reading of the pattern!- Molly/ Purl Patchwork
this is super cute! and a great tutorial. I have always wondered how the handles were assembled on a bag like this.
Thanks so much for the great pattern and apple-picking info!! Hope all is well!
Thanks for the sewing tutorial Its a great bag to make to carry anywhere .It’s just perfect for fall.Thanks for sharing
Get idea. I have two apples in my back yard that are so full the branches are about to fit bottom! I think I will make a couple bags and send them to my neighbors.
I have so much trouble sewing around those “3D” corners (sewing a bottom strip around a 90 degree angle, – 2nd picture in section “Forming the Bag”)do you have any tips for a nice clean corner?
As I was shopping for the items to make this tote, I noticed that the “bias tape maker” you call for, in 50mm, is not available on your website, they only go up to 25mm. Is this something that will come back in stock?
Thank you. I have just discovered your site and love it already.
Hi Phoebe,
The 50mm bias tape maker is on order and we should have it back in stock soon. If you’d like to send our website an email asking them to let you know when its available you can do so at this link:
https://www.purlsoho.com/purl/contact
Hi Kay-
I’m so sorry to hear you’re having a problem. I assume that you are referring to the 3rd picture in the “forming the bag” section and not the 2nd, but please let me know if this is not the case. The best way I have found to sew around a 3D corner like this is to sew down the first long side from the top to the bottom. When you reach the bottom leave the needle all the way down in the fabric but raise your machine’s foot. With the needle keeping the bag anchored as a pivot point at the bottom corner shift the bag so that the bottom of the bag is correctly aligned to be fed through the machine. Lower the foot and sew this seam until the next corner and repeat. I hope this helps. Please let us know if you have any more questions.- Molly
Hello!
I think this tote is just so cute and was wondering about how big the finished product is. More specifically, how many apples does it hold. It looks like it might be the same size as the plastic half-bushell bags my local orchard gives out. Thanks for the great project!
My next bag will be made with this pattern.
I just finished my first tote, and I love it! I’ve got another in the works right now. Thanks for the pattern!
Hi – I went to order the globalweave linen and it looks like there is no more except in white. Will you be getting more of the natural color soon or can you suggest something else similar? I liked the casual look of the linen, a little like burlap.
Hi! love the bag! I’ve just started my cutting, and although I had the fabric store cut me half a yard for the bag part, there is not enough material! Maybe two thirds of a yard would be a little safer for others out there!
After inquiring as to the bias tape maker availability in a previous post, I’ve acquired all the materials and started assembling. I’m stuck at creating the bias tape though! I can’t for the life of me figure out how to fit the 4 inch wide strip of fabric through the bias tape maker and end up with a neat 2 inch wide strip at the other end. It is too wide to fit neatly into the opening. The fabric gets jammed, or wrinkled, or off center each time. How do I thread the wide strip in to keep things on track? Thank you.
Sorry to dominate the post about bias, but I figured out how to get the “bias tape” started…now what to do if it develops a crease (lengthwide) as it is feeding through? This seems to be an issue when you come to the seams you have created by stitching the pieces together. Backing up doesn’t correct it. Any advice is welcome. Thank you.
Hi Phoebe,
It sounds like maybe your tape is a little wide. I often cut mine a tiny bit narrower than recommended, for instance for this project I would cut my fabric 3 3/4-inches wide. Hope this helps!
Joelle
Thanks for the great tutorial! I made two as Christmas presents, using a black & white houndstoothy linen. They were only the second & third bags I’ve ever made — and I was able to do it following your instructions. Like someone else pointed out, the instructed 5″ width for the ‘bias’ tape did make it a little difficult to feed through, but I got the hang of it eventually. I believe the instructions with the bias tape maker suggested a 4-7/8 width strip. The finished bags look great — thanks again!!
This is just gorgeous! Thank you so much for sharing. I’m normally an indoorsy-girl but this makes me want to run outside amongst wildflowers!! 🙂
This is a gorgeous project! Thanks for sharing the beauty!
This is wonderful!! I’d like to give this a try with my recycled potato chip/soda wrappers or my hand dyed bamboo poplin.
Thank you!!
Hi! Love this pattern! Question. What kind of seam allowance should I use when pinning and sewing the very bottom of the bag?
I love your blog! The pictures at the top are so eye catching beautiful. I am going to try to make this bag soon. Thank you for posting.
Hello, the link to your “luxurious wool blanket,” (to explain piecing together the bias tape) isn’t working
Hi Kailey,
Thanks for reaching out! Unfortunately, the original tutorial is no longer available – I’m so sorry about that! However, you can use the method shown in our Making Bias Tape Binding to piece together the handle strips.
I hope that helps!
Julianna